The secret to a successful canoe portage isn’t brute strength, but mastering a system of leverage, balance, and strategic energy conservation.
- Effective solo canoe carries rely on pendulum momentum and body mechanics, not raw power.
- Proper gear distribution (trim) is crucial for stability on water and manageability on land.
- Risk management for wind, bears, and emergencies is a non-negotiable part of the portage system.
Recommendation: Shift your mindset from enduring the portage to executing it as a technical skill; this will unlock deeper access to the Canadian wilderness with less physical strain.
The portage trail. For many aspiring backcountry canoeists in Canada, those words evoke a mix of anticipation and dread. The thought of hauling a canoe and a week’s worth of gear over uneven ground is often the single biggest barrier for adventurers planning trips in iconic parks like Algonquin or La Mauricie. The common advice is to “be strong” or “pack light,” but this overlooks the true nature of the challenge. The physical demand is real, but it’s often amplified by inefficient technique and poor planning.
Many guides focus on the lift itself, treating it as an isolated feat of strength. They might mention packing heavy items low, but they rarely connect this to a holistic system of energy management. The truth is, a successful and even enjoyable portage experience begins long before you lift the canoe. It’s a complete system encompassing how you pack your gear, how you read the water, and how you prepare for the unexpected. It’s about working smarter, not just harder.
This guide reframes the portage not as an ordeal, but as a masterable, technical skill. We will move beyond the platitude of “use your legs, not your back” to explore the physics of the lift. We’ll detail how strategic packing creates a stable boat on the water and a balanced load on your shoulders. By focusing on technique, leverage, and a systematic approach to risk, you can transform the dreaded carry from a source of anxiety into a powerful tool that grants you access to the true, untouched solitude of the Canadian wilderness.
This article provides a comprehensive breakdown of the essential skills and strategic decisions that define the art of the portage. From the mechanics of a solo carry to the crucial choice of a paddle, each section is designed to build your confidence and competence.
Summary: Mastering the Art of the Portage
- How to carry a 50lb canoe solo without injuring your back?
- Trim and balance: avoiding capsizing by packing your gear correctly
- Wind management on open water: when to stay on shore to avoid swamping?
- Bear hang vs. Barrel: securing your food in the deep wilderness
- Bent shaft vs. Straight shaft: choosing the efficient tool for flatwater tripping
- Hypothermia signs that set in within 15 minutes of exposure during accidents
- Why satellite phones are non-negotiable for remote fly-in outposts?
- Whitewater Rafting in Canada: Choosing Between Family Fun and Class V Adrenaline
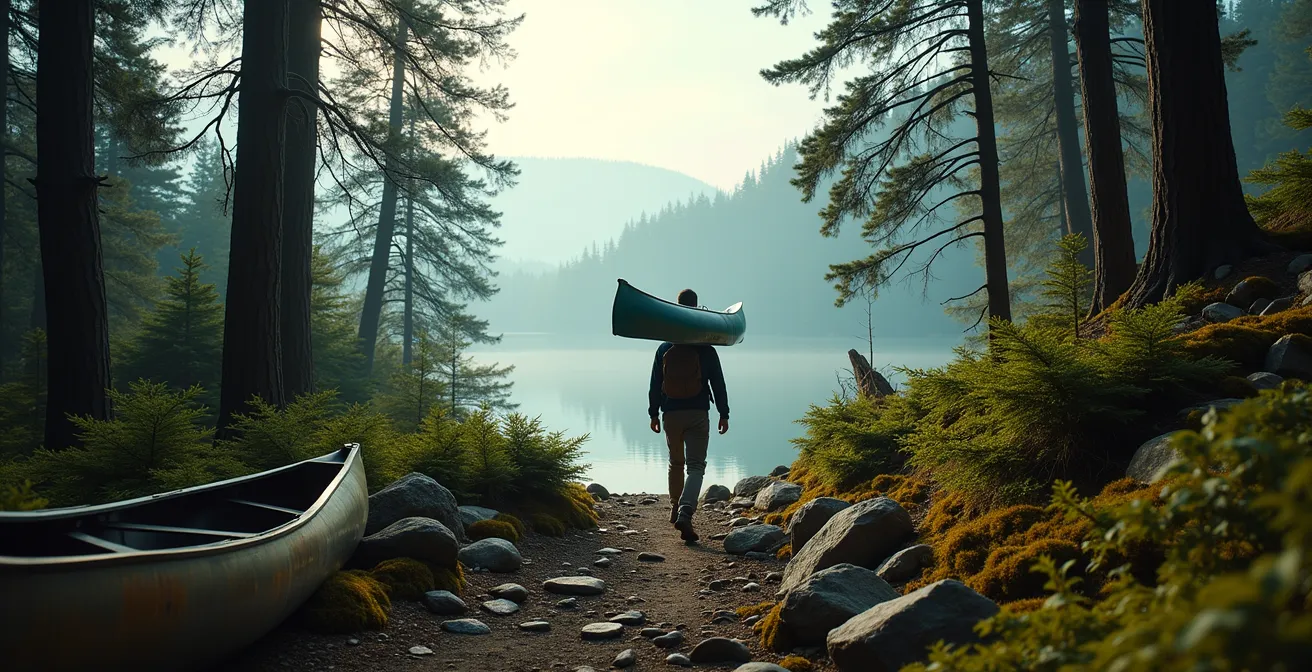
How to carry a 50lb canoe solo without injuring your back?
The image of a lone paddler with a canoe overhead is iconic, but for many, it seems like a feat of superhuman strength. The secret isn’t muscle; it’s physics. Mastering the solo carry is about using leverage and momentum, transforming the lift from a dead-weight hoist into a controlled, fluid motion. The goal is to guide the canoe onto your shoulders, not to fight its weight. This technique protects your back by relying on your body’s structure and large leg muscles.
The process starts with positioning. Stand beside the canoe and lift it onto its side, then use your thighs as a shelf. This is your first and most important use of leg power. From here, it becomes a rocking motion. By grabbing the far gunwale and the yoke, you can use a pendulum-like swing to flip the canoe overhead. There should be a moment of near-weightlessness as the canoe pivots. Once it’s on your shoulders, the final adjustment is key: shift the boat slightly forward or backward until the bow has a slight downward tilt. This provides a clear view of the trail ahead and ensures the canoe is perfectly balanced on the yoke.
Mastering this technique is not just about avoiding injury; it’s about unlocking access to true wilderness. The physical barrier of the portage is what keeps many beautiful and remote areas free from crowds.
Case Study: The Algonquin Park 5.3km Mega-Portage
A group of paddlers specifically planned their trip around Algonquin Park’s infamous 5,305-meter portage between Bonfield and Dickson Lakes. They saw this “mega-portage” not as an obstacle, but as a filter. By placing this significant physical challenge at the start of their trip, they effectively escaped the crowds that cluster near access points. The result was profound: according to an account on Outside Online detailing portage strategies, they spent three full days in the heart of the park without seeing another person, proving that the most challenging trails often lead to the greatest rewards.
With practice, this lift becomes second nature. It’s a skill that builds confidence and dramatically reduces the perceived physical toll of backcountry travel, making ambitious trips far more approachable.
Trim and balance: avoiding capsizing by packing your gear correctly
A canoe’s stability on the water—its “trim”—is not an accident. It’s the direct result of deliberate and strategic packing. An improperly loaded canoe can feel tippy, track poorly in the wind, and be dangerously unpredictable. Conversely, a well-trimmed canoe feels like an extension of your own body, stable and responsive. The principle is simple: keep the heavy weight low and centered, and distribute the remaining weight evenly from front to back and side to side.
Think of your canoe in three dimensions. The heaviest items, such as food barrels and cooking gear, should form a solid base directly on the floor of the canoe, centered along its keel. Lighter, bulkier items like sleeping bags and tents (without poles) should be packed around this core, filling the space towards the bow and stern. This creates a low center of gravity, which is the cornerstone of stability. Using compression sacks for all soft goods is a critical tactic, as it turns bulky items into dense, manageable parcels that can be fit snugly into place, eliminating empty space and preventing gear from shifting.
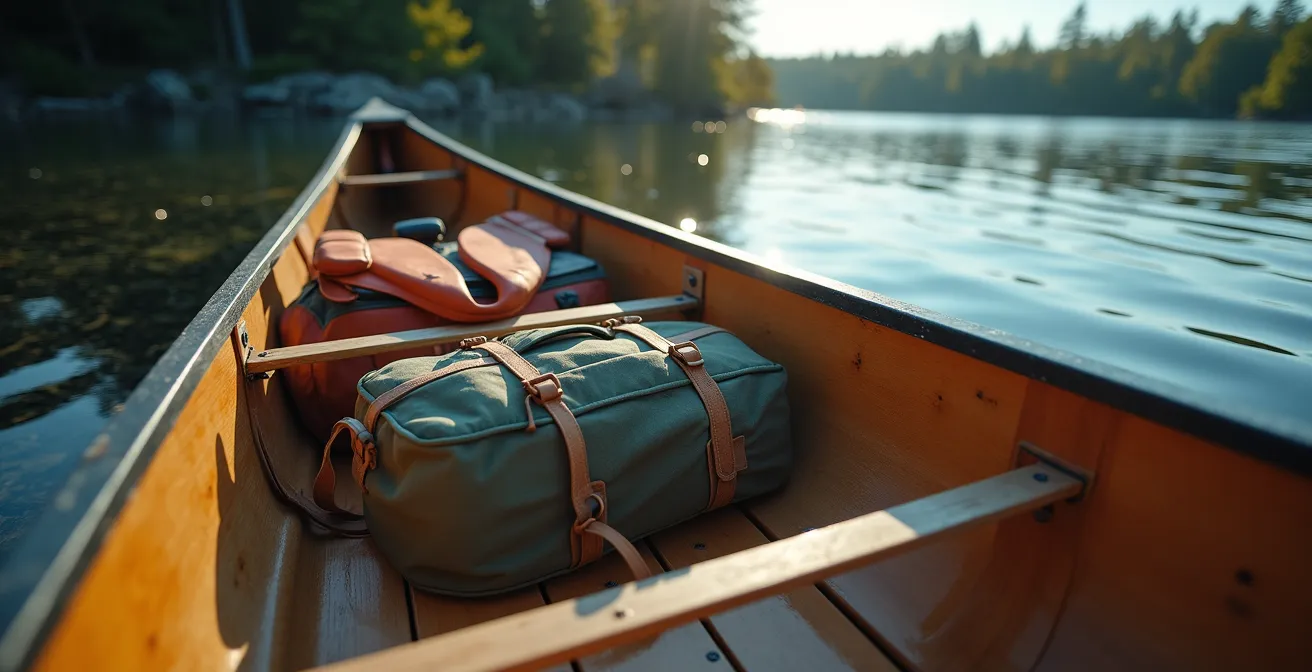
As this visualization shows, the concept extends beyond simple weight distribution. The goal is to create a single, unified mass that moves with the canoe. According to the strategic packing system advocated by Canadian gear maker Ostrom Outdoors, a well-packed portage pack should also be organized for the carry, with heavy items placed close to your back to transfer the load efficiently to your hips and legs. This dual-purpose packing—for the water and for the trail—is a hallmark of an experienced backcountry paddler.
Ultimately, a perfectly trimmed canoe is not only safer but also more efficient. It requires fewer corrective paddle strokes, saving you precious energy that you will need for the portage trail.
Wind management on open water: when to stay on shore to avoid swamping?
In the Canadian backcountry, the wind is more than an inconvenience; it’s a powerful and potentially dangerous force. A calm, glassy lake can transform into a field of whitecaps in under an hour, making a simple crossing a life-threatening challenge. Knowing when to paddle, when to alter your route, and when to stay on shore is a critical survival skill. The decision is not just about the wind’s speed, but its direction, the size of the lake (the “fetch”), and the capability of your canoe and crew.
The first rule of wind is respect. Early morning and late evening are your best friends, as winds are often calmest during these times. If you have a large, open-water crossing on your route, plan to tackle it at dawn. If you get caught by rising winds, your primary tactic is to “quarter” the waves, paddling into them at a 30-45 degree angle. This lifts the bow over the waves rather than plowing into them (which can swamp the boat) or taking them broadside (which can cause a capsize). Paddling directly with a strong tailwind can also be dangerous, as it can cause the stern to lift and the bow to “broach” or suddenly turn sideways.
In many of Canada’s premier canoeing destinations, like Quetico Provincial Park and the Boundary Waters, the landscape itself offers a solution. Veteran guide Joey Monteleone, with over two decades of experience in Quetico, emphasizes that the network of portages is a strategic tool for wind avoidance. A smart paddler studies their map not just for the shortest route, but for alternatives that break up large lake crossings and offer shelter. Sometimes, a series of shorter paddles and extra portages is a far safer and more efficient choice than fighting a losing battle against the wind on open water. This is especially true with modern, lightweight canoes. While a blessing on the trail, a craft that weighs only 40-50 pounds can be difficult to control when unladen in strong gusts.
The final, non-negotiable rule is knowing when to quit. If whitecaps are forming across the lake, if you are struggling to maintain control, or if you feel at all unsafe, the decision is simple: get to the nearest shore. No destination is worth a swamped canoe and a hypothermia emergency.
Bear hang vs. Barrel: securing your food in the deep wilderness
In the Canadian wilderness, you are a visitor in a bear’s home. Securing your food and scented items isn’t just a suggestion; it’s a fundamental responsibility for protecting both yourself and the wildlife. A bear that gets a “food reward” from a human campsite can become habituated and dangerous, often leading to its destruction. The two primary methods for food protection are the traditional bear hang and the modern bear-resistant barrel, each with its own pros and cons depending on the environment.
The classic bear hang involves hoisting your food pack into the air using a rope and a tree branch. The ideal hang is 12 feet off the ground, 6 feet from the tree trunk, and 6 feet below the supporting branch. While effective when done correctly, finding a suitable tree in some parts of the Canadian Shield can be surprisingly difficult. Furthermore, in popular parks, some bears have learned how to defeat even well-executed hangs. A bear-resistant barrel, on the other hand, offers a more foolproof solution. These hard-sided plastic containers are designed to be too tough for a bear to break into and too smooth to easily carry away. While heavier and bulkier than a simple food sack, their reliability is unmatched, especially in areas with food-conditioned bears.
According to advice from seasoned Quetico guides referenced by Bending Branches, the choice often comes down to park regulations and bear activity. In heavily used parks like Algonquin, barrels are increasingly recommended. Regardless of the method, portage sites themselves are known hotspots for habituated bears who may wait for an opportunity to snatch an unattended food pack. Vigilance is key: never leave your food pack unattended, and always count your packs at the end of every portage before launching.
For those committed to ultralight travel, the system becomes even more streamlined. Experienced paddlers often opt for a system combining commercial freeze-dried meals with a collapsible, bear-resistant sack like an Ursack. This minimizes weight and bulk, allowing a week’s worth of food to be carried efficiently within a single-trip portage system.
Bent shaft vs. Straight shaft: choosing the efficient tool for flatwater tripping
To a novice, all paddles might look the same. But for the backcountry tripper, the choice between a bent-shaft and a straight-shaft paddle is a significant decision that impacts efficiency, control, and energy conservation. Each design is a specialized tool engineered for a different purpose, and the right choice depends on the type of water you’ll be paddling.
The straight-shaft paddle is the classic, versatile workhorse. Its symmetrical design makes it intuitive to use and incredibly effective for a wide variety of steering and bracing strokes. When navigating a technical, rocky river or needing precise control to pry off a rock, the straight shaft provides superior leverage and a more solid feel in the water. It is the jack-of-all-trades, robust and reliable, making it an excellent choice for a primary paddle in mixed water conditions or as an indispensable spare.
The bent-shaft paddle, with its characteristic 10-14 degree angle where the blade meets the shaft, is a tool of pure efficiency. This design allows the blade to remain vertical in the water for a longer portion of the power phase of the stroke. This maximizes forward propulsion and minimizes the energy wasted lifting water at the end of the stroke. On long, open-water crossings on flatwater lakes, this added efficiency translates to more speed for less effort, saving significant energy over the course of a day. The trade-off is reduced versatility for complex steering strokes and a generally more fragile construction.
The following table, based on expert comparisons, breaks down the key differences for paddlers in Canadian waters.
| Feature | Bent Shaft | Straight Shaft |
|---|---|---|
| Best Terrain | Long open lake crossings | Rocky technical rivers |
| Efficiency | Higher forward speed | Better control & bracing |
| Durability | More fragile joints | Robust construction |
| Backup Value | Specialized use | Versatile spare option |
| Portage Carry | Awkward shape | Easy to strap/carry |
For most dedicated flatwater canoe tripping in parks like Algonquin or La Mauricie, a bent-shaft paddle is the superior choice for the stern paddler focused on propulsion. However, having a straight-shaft paddle on board as a spare or for the bow paddler provides a crucial layer of versatility and safety.
Hypothermia signs that set in within 15 minutes of exposure during accidents
In Canadian waters, even on a warm summer day, an unexpected capsize can become a life-threatening hypothermia event in minutes. Water strips heat from the body 25 times faster than air of the same temperature. Understanding the stages of cold water immersion and recognizing the early signs of hypothermia is not an academic exercise; it’s one of the most critical backcountry survival skills.
The immediate danger upon falling into cold water is not hypothermia itself, but the body’s shock response. The Canadian-developed 1-10-1 principle of cold water immersion outlines the timeline for survival: you have 1 minute to get your breathing under control as the cold shock response triggers an involuntary gasp reflex. You then have about 10 minutes of meaningful movement to attempt self-rescue before the cold incapacitates your muscles. Finally, it can take up to 1 hour before you lose consciousness due to hypothermia. That 10-minute window is your most critical time for action.
If you or a partner are out of the water after an immersion, the danger is not over. The early signs of hypothermia are subtle and can easily be mistaken for simple clumsiness or a bad mood. It is crucial to monitor yourself and your group for these warning signs, often referred to as the “Umbles”:
- Grumbles: Uncharacteristic irritability, apathy, or a negative attitude.
- Mumbles: Slurred or slowed speech, difficulty forming words.
- Fumbles: Loss of fine motor skills, difficulty with zippers, buckles, or simple tasks.
- Stumbles: A deteriorating sense of balance, poor coordination, and a clumsy gait.
Another key indicator is shivering. Intense, uncontrollable shivering is the body’s attempt to generate heat and is a clear sign that it’s losing the battle against the cold. The most dangerous sign of all is when this violent shivering stops. This does not mean the person is getting warmer; it means their body is running out of energy and is shutting down, a sign of severe hypothermia requiring immediate and drastic intervention.
Why satellite phones are non-negotiable for remote fly-in outposts?
As you venture deeper into the Canadian backcountry, especially into remote, fly-in only regions, your connection to the outside world disappears. Cell service is a distant memory, and your self-reliance becomes absolute. In these environments, a minor incident—a sprained ankle on a portage, a deep cut, or a sudden illness—can escalate into a life-or-death emergency. This is where a satellite communication device, such as a satellite phone or a two-way messenger, transforms from a luxury item into a non-negotiable piece of essential safety gear.
The ability to send an SOS signal with your exact GPS coordinates to an emergency response center is the ultimate safety net. It removes the “search” from search and rescue. However, experienced wilderness travellers understand that the device itself is only one part of a robust communication system. A satellite phone is useless if its battery is dead, it’s at the bottom of a lake, or if no one knows you’re missing in the first place. A comprehensive strategy is required.
This strategy involves redundancy and planning. Before you leave, you must file a detailed trip plan with a reliable contact. This plan should include your exact route, planned campsites, all portage locations, and a schedule of check-in times. When carrying the device, it must be in a secure, waterproof case that is easily accessible, even during a portage. Testing the device’s connectivity at key points, like open portage landings where the tree canopy is thinner, is also a prudent measure.
The true value of these devices was highlighted in an online discussion among experienced paddlers, who emphasized that on remote Canadian trips, a layered communication plan is critical. An injury during a long, remote carry could be catastrophic without the ability to call for help. The satellite device is the final layer of a system built on a foundation of detailed planning and communication with contacts back home.
Action Plan: Remote Portage Communication Protocol
- File a detailed float plan including all portage locations and estimated crossing times with a reliable contact.
- Establish a strict check-in schedule, accounting for potential portage delays (a good rule of thumb is to add 2 hours per kilometer of portage).
- Mark GPS waypoints at both the start and end of all major or hazardous portages before you begin the carry.
- Carry the communication device in a waterproof, accessible case attached to your person or PFD, not buried in a pack.
- Test satellite connectivity at open-canopy locations like portage landings to ensure you have a signal when you might need it most.
Key takeaways
- Portage mastery is a system: It integrates the physics of the lift, strategic packing for balance, and disciplined energy conservation.
- Risk management is proactive: It involves using portages to avoid wind, choosing the right food security method for the location, and carrying a reliable communication system.
- Technique over strength: Every aspect of backcountry canoeing, from your paddle stroke to your canoe carry, becomes easier and safer when you focus on efficient technique rather than brute force.
Whitewater Rafting in Canada: Choosing Between Family Fun and Class V Adrenaline
When faced with a stretch of rapids on a Canadian river, paddlers have a fundamental choice to make. One approach is that of whitewater rafting: to charge through, relying on heavy-duty equipment and an expert guide to navigate the chaos. The other is the way of the canoeist: to pause, evaluate, and decide whether to run, line, or portage around the obstacle. These two approaches represent fundamentally different philosophies of engaging with the wilderness.
Whitewater rafting is a thrill-focused, guide-dependent activity. The goal is to experience the adrenaline of the rapids. The equipment is heavy and specialized, and the access is limited to river sections that are commercially raftable. It’s a fantastic way to experience the power of a river in a relatively controlled setting. The canoeist’s approach, however, is one of complete autonomy and self-sufficiency. The portage is the key that unlocks this autonomy. It grants access to the sections of river and chains of lakes that are impassable for larger rafts, opening up a world of remote and quiet water.
The physical demands are also different. Rafting primarily requires upper body strength for paddling, whereas the portage system is a full-body workout, engaging the legs and core for carrying and the upper body for paddling. This table highlights the core differences in approach:
| Aspect | Whitewater Rafting | Canoe Portaging |
|---|---|---|
| Rapids Approach | Run everything with guide | Evaluate: run, line, or portage |
| Equipment Weight | Heavy duty raft (100+ lbs) | Light canoe (40-50 lbs) |
| Access to Wilderness | Limited to raftable sections | Portages grant remote access |
| Self-Sufficiency | Guide-dependent | Complete autonomy |
| Physical Demands | Upper body paddling | Full body carrying/walking |
Ultimately, the portage trail is more than just a path to walk around an obstacle. As noted in a discussion on wilderness travel philosophy, it acts as a “wilderness filter.” Even a short quarter-mile walk-in can dramatically reduce the number of people at a site compared to a drive-up location. In the deep backcountry, a portage of a mile or more becomes a gateway to true solitude, ensuring that the reward at the other end is a landscape untouched by crowds.
By shifting your perspective and treating the portage as a skill to be honed, you are not just making your trips easier; you are earning your access to the quietest corners of the Canadian wilderness. Start by practicing these techniques on shorter trips to build the confidence and muscle memory needed for your next grand adventure.