A successful Arctic expedition is not a vacation to be booked, but a supply chain to be managed; its success hinges on anticipating and mitigating key logistical failure points.
- Accessing remote communities requires a multi-stage approach combining scheduled flights, specialized northern carriers, and sometimes sealift services planned a year in advance.
- Mandatory medical evacuation insurance (minimum $500,000 USD) is non-negotiable, as standard policies do not cover the high costs of remote extraction.
- The “3-Day Buffer Rule” is the most critical planning principle to absorb the inevitable weather delays and avoid catastrophic cascading costs.
Recommendation: Shift your mindset from a tourist to a logistics manager. Prioritize your safety, communication, and transportation plans before focusing on sightseeing.
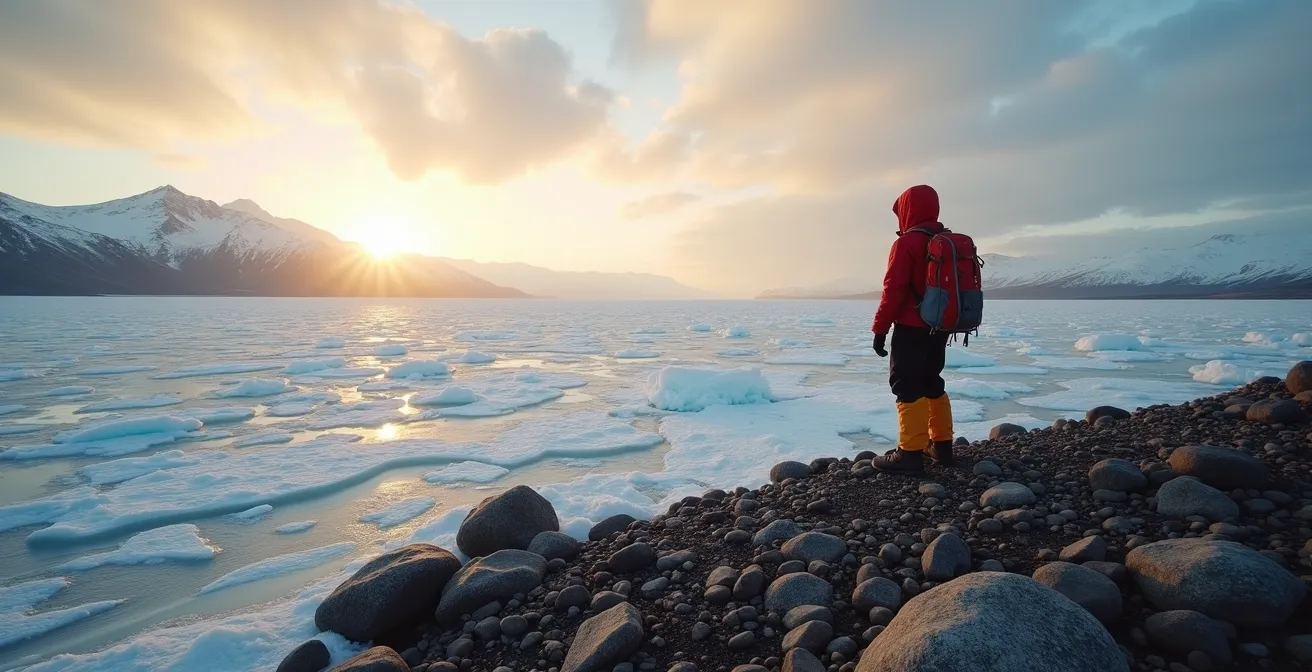
The magnetic pull of Canada’s Arctic coasts—the vast tundra, the ethereal light, the iconic wildlife—is undeniable. For the intrepid traveler, it represents one of the planet’s last true frontiers. But the very remoteness that creates its allure also erects formidable logistical barriers. Many aspiring adventurers focus on packing warm gear and booking a flight, underestimating the complex web of systems that govern life and travel above the 70th parallel. This approach often leads to costly failures, missed opportunities, and serious safety risks.
The common advice to “be prepared” is dangerously vague in a region where a single weather front can ground all air traffic for days. The real challenge isn’t just enduring the cold; it’s understanding the fragile supply chains, the unique transportation networks, and the non-negotiable safety protocols that are the bedrock of any successful northern journey. This isn’t about simply choosing a destination; it’s about building a resilient personal expedition plan.
This guide abandons the superficial checklists. Instead, we will adopt the mindset of an expedition specialist, focusing on the critical failure points of any Arctic venture. We will dissect the logistical realities of accessing remote communities, the absolute necessity of specialized insurance, the art of leveraging phenomena like the Midnight Sun, and the unwritten rules that keep people safe in an unforgiving environment. By understanding these systems, you can move beyond simply visiting the Arctic to truly and safely experiencing it.
To navigate this complex topic, this guide breaks down the core logistical challenges and strategic advantages you must master. From securing your access to planning for the unexpected, each section provides the expert knowledge needed to build a robust expedition plan.
Summary: A Logistics Guide for the Intrepid Traveler
- How to access remote coastal communities without chartering a private plane?
- Frostbite risks: what 90% of southerners forget to cover in coastal winds
- Northwest Passage vs. Hudson Bay: choosing your expedition based on wildlife goals?
- Why medical evacuation insurance is mandatory for Arctic zones?
- Maximizing sightseeing during the Midnight Sun phenomenon in June
- Getting stranded by weather: the 3-day buffer rule you must respect
- Why satellite phones are non-negotiable for remote fly-in outposts?
- Arctic Adventures for Adrenaline Junkies: Beyond Standard Sightseeing
How to access remote coastal communities without chartering a private plane?
Accessing Canada’s Arctic without the astronomical cost of a private charter requires thinking like a logistics manager, not a typical tourist. The system is a hub-and-spoke model, where major southern airports are merely the first step. Your journey must be planned in sequential stages, often involving different carriers and modes of transport. The first step is flying into a primary southern gateway city like Edmonton, Ottawa, or Montreal, which serve as the main connection points for northern-bound flights.
From there, you must book onward travel on specialized northern carriers that serve communities like Iqaluit, Cambridge Bay, or Resolute. These flights are the lifelines of the North and must be reserved well in advance, as seating is limited and serves local needs first. For travelers with significant equipment, another logistical layer is the annual sealift service. These cargo vessels are the most cost-effective way to transport non-urgent supplies, but they operate on a strict yearly schedule and require planning up to 12 months ahead.
For a select few locations, a road is a viable option. The Dempster Highway in the Yukon provides year-round road access to Tuktoyaktuk on the Arctic Ocean, a remarkable achievement of northern engineering. Finally, for inter-community or coastal travel where no scheduled service exists, resourceful travelers can sometimes find “water taxi” services by contacting community administration offices directly, uncovering unlisted but essential local transport options. For highly complex, multi-location itineraries, professional outfitters are often essential, as demonstrated by companies like Arctic Kingdom, which managed the intricate logistics for the Into The Arctic II film expedition, coordinating scheduled flights, local charters, and community transport across Nunavut.
Frostbite risks: what 90% of southerners forget to cover in coastal winds
In the Arctic, the stated air temperature is a misleading metric for safety. The true danger is the wind chill factor, which can drop the effective temperature into a zone of extreme risk for exposed skin. While the official record of -63°C recorded in Snag, Yukon, shows the potential for severe cold, frostbite can occur even at -10°C if the wind is strong enough. Southerners often pack warm jackets and pants but dangerously neglect the small, vulnerable areas of exposed skin that are most susceptible to damage in biting coastal winds.
The parts most often forgotten are the “high points” of the face: the tip of the nose, the cheekbones, and the earlobes. A small gap between goggles and a balaclava can lead to a serious frostbite injury in minutes. Proper protection means creating a complete, unbroken seal against the elements.
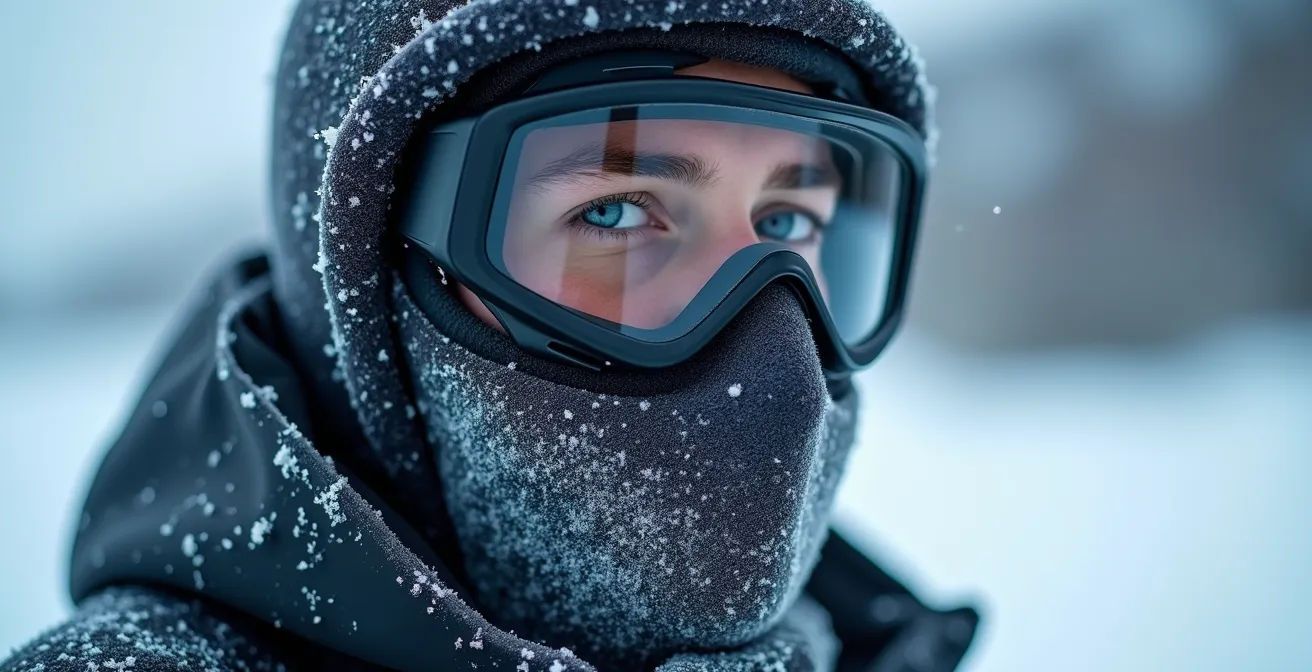
As the image above illustrates, this involves more than just a wool hat. A high-quality neoprene face mask, glacier goggles that offer full coverage, and a well-fitted hood are not optional accessories; they are critical safety equipment. Ice crystals forming on the fabric are a clear indicator of the gear working as intended, trapping moisture away from the skin. Before any excursion, it’s vital to check your gear setup for any gaps and ensure every square centimetre of skin is protected from the relentless wind.
Northwest Passage vs. Hudson Bay: choosing your expedition based on wildlife goals?
A common mistake for first-time Arctic travelers is assuming that all iconic northern wildlife can be seen in one place. In reality, Canada’s Arctic is a vast mosaic of distinct ecosystems, each with its own flagship species and peak viewing seasons. Your primary wildlife goal—be it narwhals, polar bears, or belugas—should be the single most important factor driving your choice of destination and timing. A trip to see polar bears in Churchill in November is a completely different logistical undertaking than an expedition to the High Arctic for narwhals in July.
To make an informed decision, it’s essential to compare the primary wildlife viewing hubs. The Northwest Passage offers unparalleled opportunities for elusive High Arctic marine mammals, while Hudson Bay is globally renowned for its accessible populations of polar bears and beluga whales.
| Location | Best Wildlife | Peak Season | Access Requirements |
|---|---|---|---|
| Northwest Passage (High Arctic) | Narwhal, Bowhead whales | July-August | Guide-dependent boat access |
| Hudson Bay (Churchill) | Beluga whales, Polar bears | July-Aug (belugas), Oct-Nov (bears) | Commercial flights available |
| Torngat Mountains (Labrador) | Polar bears, Black bears, Caribou | July-September | Charter flight or cruise ship |
The table above, based on data from specialists like leading Arctic tour operators, clarifies these critical differences. A quest for narwhals and bowhead whales funnels you toward the floe edges of the Northwest Passage in mid-summer, an experience entirely dependent on specialized, guide-led boat access. Conversely, if your goal is to see the world’s most accessible polar bear population, the choice is unequivocally Churchill, Manitoba, in October or November. For those wanting to see thousands of beluga whales, that same Hudson Bay region comes alive in July and August. Each goal dictates a specific time and place, with vastly different access requirements.
Why medical evacuation insurance is mandatory for Arctic zones?
In the Canadian Arctic, the question is not *if* you need medical evacuation insurance, but *which* specialized policy you must secure. Standard travel insurance, including premium credit card policies, is functionally useless for a serious incident in a remote northern location. These policies are not designed to handle the staggering costs and complex logistics of an air ambulance evacuation from a fly-in outpost. According to U.S. CDC estimates, medical evacuation costs can exceed $250,000 from remote Arctic locations.
For this reason, all reputable tour operators and Parks Canada (for permitted activities) make specific, high-value medical evacuation coverage a mandatory condition of travel. This is not a recommendation; it is a prerequisite. Without proof of adequate coverage, you will not be permitted to join an expedition or enter a national park. This requirement reflects the reality that local communities have limited medical facilities and any serious injury or illness necessitates immediate transport south, an operation that involves specially equipped aircraft and medical teams on standby.
Securing the correct policy requires careful attention to detail. The process is not as simple as checking a box on a travel website; it involves verifying specific coverage details to ensure you meet the stringent requirements of northern travel.
Your Action Plan: Securing Arctic-Compliant Evacuation Insurance
- Verify minimum coverage: Confirm the required amount. Many operators, for example, mandate a minimum of $500,000 USD in emergency medical evacuation coverage per person.
- Distinguish coverage types: Understand that standard travel medical insurance is different from wilderness evacuation coverage. Most policies explicitly exclude expeditions in remote regions.
- Select a specialized provider: Purchase a policy from a company like Global Rescue or a specific plan from Manulife that explicitly covers Arctic conditions and remote locations.
- Confirm air ambulance services: Your policy documents must specifically mention coverage for air ambulance and medical repatriation services. General “emergency transport” is not sufficient.
- Document and provide proof: Carry a copy of your policy details at all times and be prepared to submit proof of coverage to your tour operator or to Parks Canada for permit approval.
Maximizing sightseeing during the Midnight Sun phenomenon in June
The Midnight Sun is more than just a novelty; for the strategic planner, it’s a powerful logistical advantage. From late May to July in the High Arctic, 24-hour daylight fundamentally changes the rhythm of life and travel. It erases the constraints of a typical day, allowing expedition schedules to become fluid and responsive to the two factors that matter most in the North: weather and wildlife. Instead of being forced to return to camp by dusk, you can wait out a patch of bad weather or linger for hours with a wildlife sighting, knowing you have limitless light.
Perhaps the most significant benefit is the extension of the “golden hour,” the period of soft, angled light beloved by photographers. In southern latitudes, this magical light lasts for a brief window at sunrise and sunset. In the Arctic summer, it can last for hours on end.
Case Study: Lindblad Expeditions and the Extended Golden Hour
Expedition companies like Lindblad Expeditions document how they leverage the Midnight Sun for superior experiences. Along straits like Alanguarqap Suvdlua, the sun circles the horizon without setting, creating a “golden hour” that can last for three to four hours. This allows their ships and zodiacs to schedule activities with maximum flexibility, launching photography-focused excursions late at night to take advantage of both the sublime light and often calmer sea conditions, a strategy impossible in other parts of the world.

This endless daylight transforms sightseeing from a scheduled activity into an opportunistic pursuit. The best views and encounters often happen at 2 AM under a golden sun. The key is to adapt your own internal clock, resting when the weather is poor or when there’s a lull in activity, and being ready to venture out at any hour when conditions are perfect. This flexibility is the true secret to maximizing your time during the Arctic summer.
Key Takeaways
- Adopt a supply chain mentality: Your trip’s success depends on managing logistical weak points in transport, communication, and safety.
- Medical evacuation insurance is non-negotiable: Standard policies are void; you must secure a specialized plan with at least $500,000 USD in coverage.
- The 3-Day Buffer Rule is your most critical planning tool: Always budget a minimum of three extra days at the end of your trip to absorb inevitable weather delays.
Getting stranded by weather: the 3-day buffer rule you must respect
In the Canadian Arctic, weather is not an inconvenience; it is the single most powerful force governing all movement. Fog, high winds, or a sudden freeze-up can ground all flights for days at a time, severing a community’s connection to the outside world. The most critical error a southern traveler can make is to plan a tight itinerary that doesn’t account for this absolute certainty of disruption. This leads to the most common logistical failure in the North: the cascading costs of being stranded.
When your flight out of a remote community is cancelled, you don’t just miss that flight. You miss your connecting flight in Iqaluit or Yellowknife. Then you miss your major flight south from there. Because northern flights are often sold as separate tickets, airlines are not obligated to rebook your entire journey. You are left responsible for purchasing new, last-minute, full-fare tickets for every leg of your trip home, on top of paying for extra nights of accommodation. This can easily add thousands of dollars in unexpected costs to your budget.
To mitigate this predictable failure point, expedition professionals live by one simple, non-negotiable principle: the 3-Day Buffer Rule. This means you must always plan to have a minimum of three full, unscheduled days between your planned departure from the remote Arctic and any essential commitment back home. These are not “extra” days for more sightseeing; they are a mandatory logistical cushion built into your schedule. For travel during the shoulder seasons of May (break-up) or September/October (freeze-up), this buffer should be extended to five or even seven days.
Why satellite phones are non-negotiable for remote fly-in outposts?
In the vast expanses of the Canadian Arctic, outside of the few community centers, there is no cell service. It does not exist. For any travel beyond the immediate vicinity of a settlement, a satellite communication device is not a backup plan; it is your primary and only lifeline to the outside world. Relying on the hope of encountering another person or being within range of a hypothetical signal is a grave and potentially fatal mistake. A satellite phone or messenger is an indispensable piece of safety equipment.
The choice of device matters. As one arctic communications specialist notes in a technical comparison, “Above the 70th parallel, Iridium’s true global network of low-earth-orbit satellites provides more reliable connectivity than geostationary satellite networks.” This is because Iridium’s satellites are constantly moving across the sky, ensuring a connection is possible even in deep valleys or on the north side of a mountain, where a stationary satellite on the southern horizon would be blocked.
Case Study: Canada’s Real-World SOS Response Chain
When you press the SOS button on a device in the Arctic, you initiate a highly coordinated federal response. As detailed by expedition operators like HX Hurtigruten, the signal is routed to the Joint Rescue Co-ordination Centre (JRCC) in Trenton, Ontario. JRCC then becomes the central command, coordinating a response with the RCMP, Parks Canada, and the Canadian Rangers in the relevant region. For incidents in the Kitikmeot region of Nunavut, the Canadian High Arctic Research Station in Cambridge Bay serves as a critical local hub, demonstrating a robust but geographically stretched system that relies entirely on that initial satellite signal.
Setting up your device correctly is just as important as carrying it. Before heading into the field, you must:
- Choose the right device for your needs: a full Iridium satellite phone for two-way voice communication or a messenger like a Garmin inReach or Zoleo for text-based messaging and SOS functions.
- Rent or buy in a southern gateway city like Ottawa or Edmonton for better availability and pricing.
- Thoroughly test the device before you leave civilization and ensure you understand its functions.
- Program key emergency numbers, including the local RCMP detachment and the direct line for JRCC Trenton.
- Pack spare batteries and, in extreme cold, keep the device and batteries warm inside your jacket, close to your body, to preserve their charge.
Arctic Adventures for Adrenaline Junkies: Beyond Standard Sightseeing
Once you have mastered the fundamental logistics of Arctic travel—transport, safety, and communication—a world of high-octane adventure opens up. For the experienced and adrenaline-seeking traveler, the Canadian Arctic offers challenges and experiences found nowhere else on Earth. These activities, however, demand an entirely new level of expertise, specialized gear, and an uncompromising approach to risk management. This is the “expert level” of northern travel, where the logistical foundation you’ve built becomes the platform for extraordinary feats.
These are not activities for the casual tourist. They often require specific certifications, advanced technical skills, and a deep respect for the amplified dangers of the environment. From sea kayaking in polar bear territory to ice diving at the floe edge, each pursuit carries its own unique set of risks and logistical requirements.
| Adventure Type | Location | Difficulty Level | Special Requirements |
|---|---|---|---|
| Sea Kayaking with Belugas | Seal River Estuary, Manitoba | Moderate | Polar bear guard required |
| Kite-Skiing Expedition | Penny Ice Cap, Baffin Island | Expert | Crevasse navigation skills |
| Scuba Diving Floe Edge | Arctic Bay, Nunavut | Extreme | Dry suit & ice diving certification |
| Firearms for Protection | All remote areas | Complex | PAL permit, local training mandatory |
As the table highlights, each advanced adventure requires a corresponding skill set. Kite-skiing across Baffin Island’s Penny Ice Cap is a world-class expedition, but it is only for those with proven crevasse navigation and rescue skills. Scuba diving under the sea ice is a sublime experience, but it is exclusively for divers with dry suit and ice diving certifications. Even activities that seem more accessible, like sea kayaking, require a mandatory armed polar bear guard when conducted in areas like the Seal River Estuary. Furthermore, carrying a firearm for protection in remote areas is a complex legal and practical matter, requiring a Canadian Possession and Acquisition Licence (PAL) and often mandatory local training on safety and bear deterrence.
The first step toward any Arctic journey, from sightseeing to extreme expeditions, begins with a foundational plan rooted in safety and logistical reality. Begin evaluating your goals and building your expedition plan today with a mindset focused on managing the unique challenges of the North.
Frequently Asked Questions About Canadian Arctic Travel
Why is Resolute considered one of the coldest inhabited places?
Resolute, with just 200 residents, maintains an average yearly temperature of -14.5°C and serves as a main gateway for Arctic explorers despite extreme conditions.
What happens if weather delays my Arctic flight connections?
Multi-day delays can cascade into thousands in extra costs – hotels, rebooking fees, and new full-fare tickets when original connections are missed.
Should I budget more buffer days during shoulder seasons?
Yes, budget 5-7 days buffer in May (break-up) or September (freeze-up) instead of the standard 3-day rule for peak summer travel.