
In summary:
- Proactive acclimatization starting two weeks before your hike is non-negotiable to prevent severe altitude sickness.
- Mastering timing is crucial; an “alpine start” before dawn is your primary defense against deadly afternoon thunderstorms.
- Your gear must balance weight reduction with mandatory safety items, including a robust layering system and always-accessible bear spray.
- True safety is a mindset: it’s about understanding the mountain’s dynamics and knowing your personal limits and turn-around thresholds.
The allure of a Rocky Mountain summit is a powerful call. Standing on a peak in Banff or Jasper, with the world stretching out below, is an experience that justifies the sweat and strain of the ascent. For many outdoor enthusiasts, it’s the ultimate goal. The common advice is well-known: pack layers, bring bear spray, and check the weather. While this is sound, it’s merely the starting point. It’s the equivalent of a pilot’s pre-flight checklist—essential, but it doesn’t teach you how to fly the plane through turbulence.
True safety in high-altitude environments isn’t about a simple list of items. It’s a strategic mindset rooted in understanding the dynamic forces at play: the physiology of your own body under stress, the predictable patterns of mountain weather, and the unforgiving nature of the terrain. The real key to a successful and safe summit attempt isn’t just what you carry, but when you move, how you prepare, and why you must be willing to turn back. It’s about respecting the mountain not as a challenge to be conquered, but as a powerful system to be navigated with knowledge and humility.
This guide, built from years of experience on these very trails, will move beyond the basics. We will delve into the critical protocols that separate a triumphant summit from a rescue operation. We’ll cover how to recognize and prepare for altitude sickness, the science of timing your hike to avoid electrical storms, how to pack smart without compromising safety, and how to navigate the unique driving hazards of the region. This is the operational knowledge you need to make your Rocky Mountain dream a safe reality.
This comprehensive guide details the essential safety protocols for your high-altitude adventures in the Canadian Rockies. Below is a summary of the key topics we will cover to ensure you are fully prepared.
Summary: Hiking Rocky Mountain Peaks: Safety Protocols for High-Altitude Trails
- Altitude sickness symptoms that hit hikers above 2,500 meters
- How to prepare your lungs for high-elevation exertion 2 weeks prior?
- When to start your hike to avoid dangerous afternoon thunderstorms?
- Banff vs. Jasper peaks: where are the crowds thinner in August?
- Reducing pack weight by 2kg without sacrificing mandatory safety gear
- How to drive safely during sudden mountain snow squalls in summer?
- How to dress for the temperature drop at the summit in summer?
- Driving Rocky Mountain Loops: The Golden Triangle Itinerary Guide
Altitude sickness symptoms that hit hikers above 2,500 meters
Acute Mountain Sickness (AMS) is the first and most common challenge your body faces when ascending into the high Rockies. Above 2,500 metres (approx. 8,200 feet), the air has less oxygen, and your body must work harder. AMS is your body’s protest against this rapid change. The initial symptoms are often subtle and can be mistaken for simple fatigue or dehydration. A persistent, throbbing headache is the hallmark sign, often accompanied by nausea, dizziness, and a profound lack of energy. Ignoring these signs is a critical error.
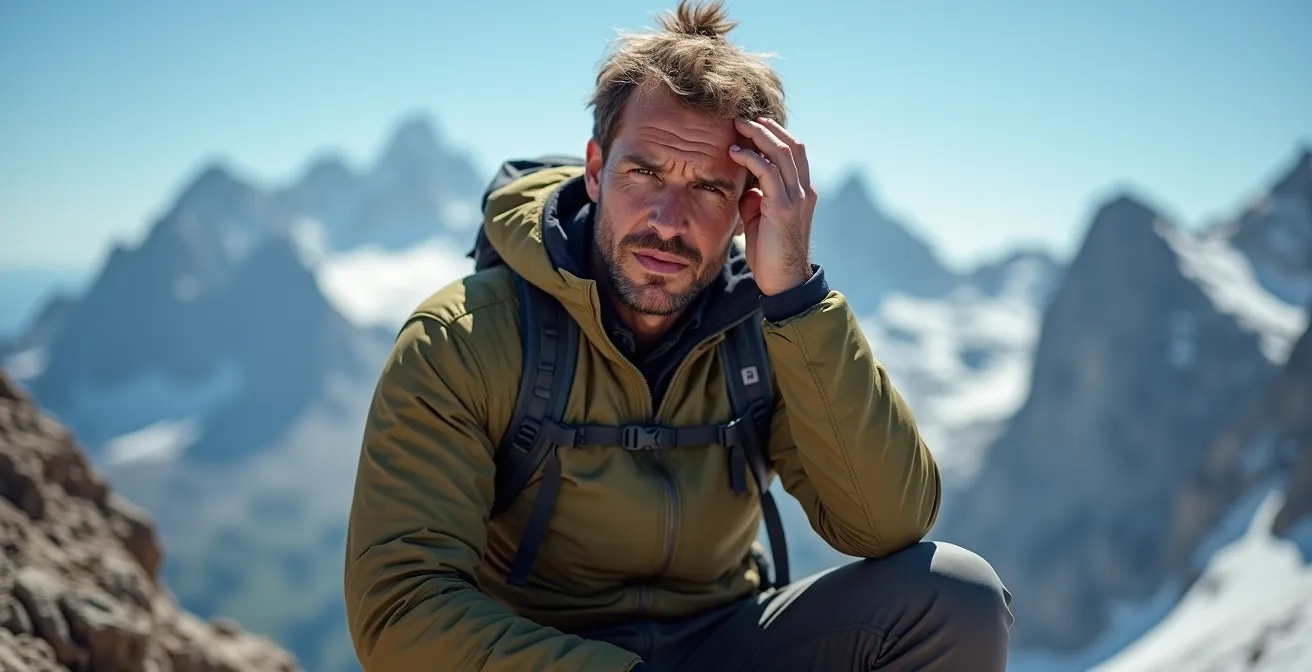
As this image illustrates, the feeling is one of complete exhaustion and disorientation. If these symptoms progress, they can evolve into life-threatening conditions. High-Altitude Pulmonary Edema (HAPE), where fluid fills the lungs, and High-Altitude Cerebral Edema (HACE), where the brain swells, are medical emergencies. Authoritative research published in Frontiers in Physiology shows that HAPE usually occurs after 1-5 days at altitudes over 2,500-3,000m. The only effective treatment is immediate descent. Do not ascend further if you or anyone in your group exhibits moderate AMS symptoms. The mountain will be there tomorrow; ensure you are too.
How to prepare your lungs for high-elevation exertion 2 weeks prior?
The most effective way to combat altitude sickness is to prepare your body before you even set foot on the trail. Arriving from sea level and immediately attempting a high-altitude hike is a recipe for failure and illness. Your respiratory and circulatory systems need time to adapt to the lower oxygen levels. This process, known as acclimatization, should begin at least two weeks before your trip. The goal is to improve your body’s oxygen efficiency.
Engaging in cardiovascular training is the cornerstone of this preparation. Focus on activities that elevate your heart rate for sustained periods, like running, cycling, or swimming. To better simulate the stress of altitude, incorporate high-intensity interval training (HIIT) into your routine. These bursts of maximum effort followed by short recovery periods help train your body to perform under oxygen debt. A structured approach is key:
- Begin acclimatization training at least two weeks before your trip to elevations above 2,500m.
- Perform cardio exercises at progressively increasing intensities to simulate the stress of exertion at altitude.
- Practice controlled breathing exercises, such as box breathing, to improve your oxygen efficiency and remain calm under physical stress.
- Once in the mountains, limit your daily elevation gain to 500 metres once you are above 2,500m to allow your body to adapt gradually.
- After consulting with a physician, you might consider prophylactic acetazolamide, but it’s crucial to trial it beforehand to assess your tolerance.
When to start your hike to avoid dangerous afternoon thunderstorms?
In the Canadian Rockies, the clock is as important as your compass. The single greatest weather threat during the summer hiking season is the afternoon thunderstorm. These are not gentle rain showers; they are violent, fast-moving systems that bring torrential rain, hail, and lethal lightning strikes. They typically form as the sun heats the ground and mountain slopes, causing warm, moist air to rise and condense. This process usually peaks in the early to mid-afternoon. Therefore, your start time is not a suggestion; it is your primary safety tool.
The “alpine start” is a non-negotiable rule. This means starting your hike well before sunrise, often as early as 3 or 4 a.m. for long summit attempts. Your goal should always be to be on the summit by late morning and well below the exposed treeline before the clouds begin to build, typically around 1 p.m. Rocky Mountain safety experts strongly recommend this strategy to avoid being caught in a dangerous position. Waiting for a storm to pass on an exposed ridge is a life-threatening gamble.
Case Study: The Danger of “Summit Fever”
One of the biggest dangers for hikers is ‘summit fever’—a determined insistence on reaching a goal despite clear signs of building storms above the treeline. Many fatalities from lightning have occurred because hikers chose to race on to accomplish their goal rather than turning back. The wisest decision is always to turn around and try another day, or wait safely below the treeline until the storm has completely passed. The summit isn’t a trophy; it’s a waypoint on a journey that only ends when you are safely back at the trailhead.
Banff vs. Jasper peaks: where are the crowds thinner in August?
Both Banff and Jasper National Parks offer world-class hiking, but they provide distinctly different experiences, especially during the peak month of August. Your choice between them will depend on your tolerance for crowds and your desire for a true wilderness feel. Banff, being closer to the major population center of Calgary and home to iconic, easily accessible locations like Lake Louise, experiences extremely high visitor numbers. Trails can be crowded, and parking lots often fill before sunrise.
In contrast, Jasper offers a more remote and rugged experience. While it is by no means empty, the visitors are more dispersed over a larger, less developed area. This often translates to quieter trails and a greater sense of solitude, which for many is the very essence of a mountain adventure. The trade-off is that services are sparser and rescue response times can be longer, demanding a higher degree of self-sufficiency.
The following table breaks down the key characteristics to help you make an informed decision based on your hiking style and safety considerations.
| Factor | Banff National Park | Jasper National Park |
|---|---|---|
| Crowd Levels in August | Very High – especially at Lake Louise trails | Moderate – more dispersed visitors |
| Trail Requirements | Some trails require groups of 4-6 for bear safety | Similar requirements, longer rescue response times |
| Signature Trail | Multiple day hikes from Lake Louise | Skyline Trail – 44km legendary backpacking route |
| Accessibility | Closer to Calgary, more developed | More remote, wilderness experience |
Reducing pack weight by 2kg without sacrificing mandatory safety gear
Every gram counts at altitude. A heavy pack drains your energy, slows your pace, and increases the strain on your joints. The goal of a “light pack” is not to leave essentials behind, but to make smarter choices for every item you carry. Shaving off even two kilograms (about 4.4 pounds) can make a significant difference in your performance and endurance. This requires a meticulous audit of your gear, replacing heavy, bulky items with lightweight, multi-functional alternatives.
Begin by scrutinizing the “big three”: your pack, shelter, and sleep system (if backpacking). For day hikes, a 20-40L pack is more than sufficient; avoid the temptation to use a larger, heavier pack. From there, focus on a series of small, cumulative savings:
- Replace standard hard-sided water bottles with soft flasks or a hydration reservoir, saving 150-200g.
- Swap a bulky, pre-made first aid kit for a curated set of essentials in an ultralight stuff sack.
- Choose merino wool base layers over cotton; they are lighter, insulate when wet, and dry much faster.
- If carrying an emergency shelter, consider using your trekking poles as the support structure for a lightweight tarp.
- Repackage food from commercial bags into simple, resealable plastic bags.
However, weight reduction must never come at the cost of safety. Certain items are non-negotiable. As hiking expert Alec Sills-Trausch emphasizes in his guide:
You’ll want sturdy boots, moisture-wicking shirts, flexible pants, and a solid day pack. Remember the layering strategy of baselayer, fleece jackets and/or puffies, and an outer shell in case of weather. I suggest bringing some of the 10 Essentials. Furthermore, having bear spray is a must.
– Alec Sills-Trausch, Best Canadian Rockies Hikes Guide
How to drive safely during sudden mountain snow squalls in summer?
The term “summer” can be misleading in the Canadian Rockies. While valleys may be warm and sunny, high mountain passes can experience winter conditions at any time of year. Sudden, intense snow squalls can develop with little warning, drastically reducing visibility and making roads treacherous. Highwood Pass in Kananaskis Country, for example, is the highest paved pass in Canada at an elevation of 2,200m, presenting unique driving challenges even in July and August. Being prepared for these events is a critical part of your travel safety.
When a snow squall hits, visibility can drop to near-zero in seconds, creating a dangerous “whiteout” condition. Your immediate response should be to reduce speed, turn on your headlights and hazard lights, and increase your following distance dramatically. Panic is your enemy. The key is to make smooth, deliberate movements with your steering and braking. If conditions become too severe to continue, the priority is to pull over safely and completely off the roadway. Stopping in a live traffic lane during a whiteout is incredibly dangerous.
Action Plan: Driving in a Summer Snow Squall
- Check road conditions on the 511 Alberta and DriveBC apps before entering any mountain pass.
- Reduce speed immediately when visibility drops below 100 meters.
- Turn on your full headlights and hazard lights to be as visible as possible.
- If visibility becomes near-zero, pull over at a designated viewpoint or as far off the road as is safely possible. Do not stop in a traffic lane.
- Always keep an emergency kit in your vehicle with blankets, water, food, and a flashlight.
How to dress for the temperature drop at the summit in summer?
The most common mistake novice hikers make is dressing for the temperature at the trailhead. In the Rockies, you must dress for the worst conditions you might face, which are almost always at the summit. A fundamental rule of mountain meteorology is the temperature lapse rate. As a guideline, you can expect a 10°C temperature drop per 1000m of elevation gain, according to Alberta Health. Add in wind chill, and a pleasant 20°C day in the valley can feel like a freezing winter day on an exposed peak.
The only effective way to manage these drastic temperature swings is a three-part layering system. This system allows you to add or remove clothing to precisely regulate your body temperature, preventing both overheating during the strenuous ascent and hypothermia from sweat-soaked clothes at the windy summit. Each layer has a specific function.

Your system should consist of:
- The Baselayer: Worn against the skin, its sole job is to wick moisture (sweat) away from your body. This must be a synthetic material like polyester or natural wool like merino. Cotton is forbidden; it absorbs moisture and will chill you to the bone.
- The Mid-Layer: This is your insulation. Its job is to trap warm air. A fleece jacket or a lightweight “puffy” jacket with down or synthetic fill is ideal. You may carry multiple mid-layers of varying weights.
- The Shell Layer: This is your protection from the elements. It must be both waterproof and windproof. A high-quality rain jacket is a non-negotiable piece of gear, even if the forecast is clear.
Key Takeaways
- Acclimatization isn’t optional; it’s a physiological necessity. Prepare your body for weeks before tackling high-altitude trails.
- Your start time is your best defense against weather. An “alpine start” before dawn is a non-negotiable protocol to avoid afternoon thunderstorms.
- “Summit fever” is a documented psychological trap. The wisdom to turn back in deteriorating conditions is the mark of a true mountaineer.
Driving Rocky Mountain Loops: The Golden Triangle Itinerary Guide
The Golden Triangle is a spectacular driving loop that connects Banff and Jasper National Parks with the towns of Golden and Radium Hot Springs, utilizing the Trans-Canada Highway, Highway 95, and the legendary Icefields Parkway (Highway 93). While stunning, this route presents a unique set of driving hazards that demand your full attention. The conditions and available resources vary dramatically between each leg of the journey, requiring different levels of preparation and vigilance.
The Icefields Parkway, in particular, is one of the most beautiful and most hazardous drives. It features a 90-kilometer stretch with no services—no gas, no food, and critically, no cell phone reception. Wildlife on the road is a constant threat, especially at dawn and dusk. Driving this loop is not like a typical highway road trip; it’s a journey into a remote wilderness where self-sufficiency is paramount. Before embarking, ensure your vehicle is in excellent condition and fully fueled.
| Highway Section | Key Hazards | Emergency Resources |
|---|---|---|
| Highway 1 (Trans-Canada) | Wildlife crossings, sudden weather changes | Regular cell coverage, frequent towns |
| Highway 95 (Golden-Radium) | Logging truck traffic, narrow sections | Limited cell service, sparse facilities |
| Highway 93 (Icefields Parkway) | 90km no-service stretch, wildlife hotspots | Satellite phones recommended, ranger stations |
Wildlife encounters are a certainty. While seeing a bear, elk, or bighorn sheep is a highlight, a collision can be catastrophic. Adopt a defensive driving posture at all times:
- During dawn and dusk, the peak hours for wildlife activity, reduce your speed by at least 20km/h below the posted limit.
- Continuously scan the ditches and sides of the road for movement and the reflection of eyes in your headlights.
- If you spot an animal, slow down immediately and be prepared to stop. Where there is one, there are often more.
- Never exit your vehicle to approach or photograph wildlife on or near the road. Maintain a safe distance and stay inside your car.
You are now equipped with the mindset and protocols of a seasoned mountain traveler. This knowledge is not meant to inspire fear, but to foster respect and confidence. Plan your ascent, check your gear, read the signs the mountain gives you, and be prepared to act decisively. Your adventure in the Canadian Rockies awaits—go and earn your summit safely.