The key to an awe-inspiring Icefields Parkway drive isn’t just the scenery, but mastering its unique logistical challenges.
- Departing before 7:00 AM is critical to beat the main wave of bus tours arriving at the Columbia Icefield.
- The 230-kilometre cell service ‘dead zone’ and a single, expensive gas station require dedicated pre-trip planning.
Recommendation: Plan your timing, fuel, and offline maps like a seasoned expert to transform a potentially stressful trip into a seamless wilderness adventure.
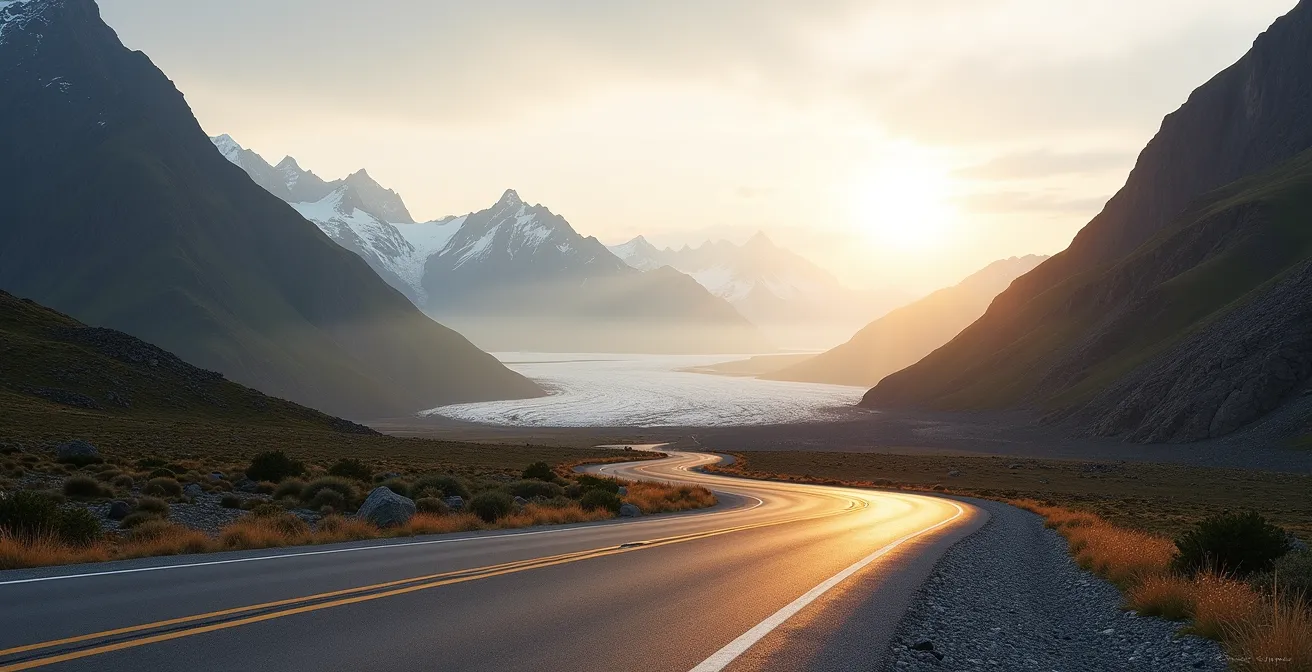
The Icefields Parkway is more than a road; it’s a promise. A 230-kilometre ribbon of asphalt winding through the heart of the Canadian Rockies, offering a spectacle of turquoise lakes, ancient glaciers, and towering peaks. For many, it’s the highlight of a trip to Banff and Jasper National Parks. The dream is a leisurely drive, stopping spontaneously for breathtaking photos. The reality, however, can often be a conga line of tour buses, crowded viewpoints, and the low-grade anxiety of a dwindling gas tank with no service station in sight.
Standard advice often falls short. You’ll hear “start early” or “fill up on gas,” but these tips are just the starting point. They don’t tell you how early is early enough to beat the fleet of tour buses descending on the Columbia Icefield, nor do they quantify the staggering cost of running out of fuel in this remote corridor. They don’t prepare you for the strategic mindset required to truly master this drive.
This guide changes that. We’re moving beyond the platitudes to arm you with a concrete strategy. This is about turning your drive into a logistical ballet, where timing, preparation, and knowledge allow you to experience the raw, untamed beauty of the Parkway without the friction of the crowds. It’s about seeing the glaciers, not just the back of a tour bus.
We will break down the precise timing to outsmart the crowds, the essential safety protocols for unpredictable mountain weather, the practical realities of resource scarcity, and the ethical responsibilities of being a guest in this wild domain. Follow this plan, and your journey will be defined by awe, not anxiety.
Summary: Your Strategic Guide to the Icefields Parkway
- When to start driving to beat the Columbia Icefield bus tours?
- How to drive safely during sudden mountain snow squalls in summer?
- Peyto Lake vs. Bow Lake: which stop requires a hike for the view?
- Why there is no cell service for 230km of the journey?
- Running out of gas between Lake Louise and Jasper: a costly mistake
- Reducing pack weight by 2kg without sacrificing mandatory safety gear
- Banff Gondola vs. Jasper Skytram: comparing altitude and amenities
- Wildlife Viewing Ethics: Observing Bears and Moose Without Harm
When to start driving to beat the Columbia Icefield bus tours?
The single greatest factor in a crowded or quiet Icefields Parkway experience is your timing relative to the armada of tour buses. The Columbia Icefield Discovery Centre is their primary destination, and your goal is to arrive well before they do. Simply “starting early” is not specific enough; a strategic departure is required.
Tour buses from Banff and Lake Louise typically begin their tours around 9:00 AM, arriving at the Icefield between 10:30 AM and 11:00 AM. This creates a peak congestion window that lasts until mid-afternoon. To avoid this, you must operate on a different schedule. If starting from the south (Lake Louise/Banff), you must depart by 5:30 AM at the latest. This puts you at the Icefield before 8:00 AM, giving you a quiet hour or more before the first crowds appear. If starting from the north (Jasper), a departure before 7:00 AM allows you to reach the Icefield by 8:00-8:30 AM, achieving the same result.
Alternatively, embrace the “golden window” in the late afternoon. Most tours depart the Icefield by 3:00 PM to make their return trips. Arriving after 3:30 PM often means significantly fewer people and a more serene experience on the Athabasca Glacier. As a bonus, some tour operators may offer discounts for these later time slots. The key is to consciously plan your day to hit this main attraction outside the 10:30 AM to 3:00 PM peak.
How to drive safely during sudden mountain snow squalls in summer?
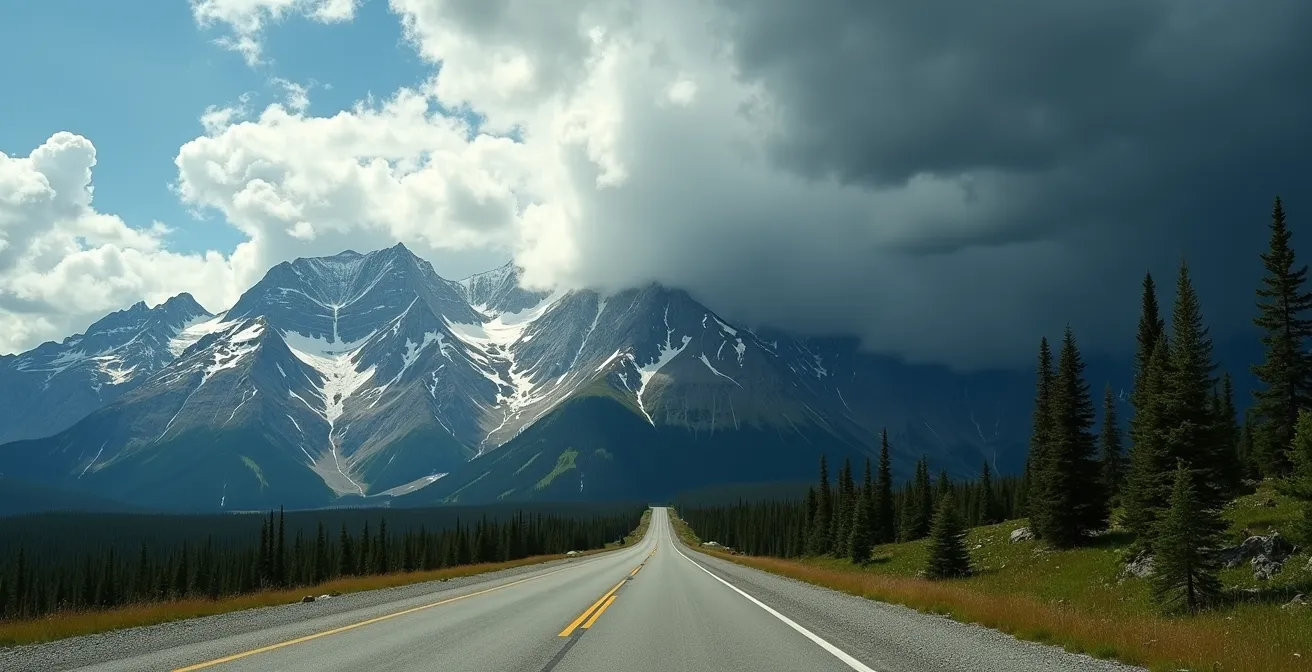
The majestic peaks of the Rockies create their own weather, and even in July and August, a sunny day can turn into a white-knuckle winter scene in minutes. Sudden snow squalls are a serious and surprisingly common summer hazard on the Parkway. These are not gentle flurries; they are intense, localized storms that can drop visibility to near zero almost instantly. Being prepared is not about being paranoid; it’s about being a responsible mountain driver.
The first line of defense is visual. Look for a dark, solid wall of cloud moving rapidly over a mountain ridge—this is the classic sign of an incoming squall. The moment you see this or visibility begins to drop, your response must be immediate:
- Reduce speed immediately to well below the 90 km/h limit. Aim for 50-60 km/h or less as conditions worsen.
- Activate your hazard lights to make yourself visible to vehicles behind you.
- Scan ahead for the next designated, paved pull-off area. Never, ever stop on the narrow road shoulder. This is how low-visibility chain-reaction collisions happen.
- If you pull over, wait for the squall to pass. They are often intense but brief, lasting 15-30 minutes.
Before you even enter the Parkway’s cellular dead zone, check the forecast and road conditions on Alberta 511. Most importantly, have an emergency kit in your vehicle, even on the sunniest summer day. This should include a warm blanket, water, high-energy snacks, and a headlamp. In the mountains, you are responsible for your own safety between designated service areas.
Peyto Lake vs. Bow Lake: which stop requires a hike for the view?
Two of the most iconic and unmissable turquoise lakes on the southern section of the Parkway are Bow Lake and Peyto Lake. While both offer stunning views, their accessibility is fundamentally different, which is crucial for planning your stops, especially if you have limited time or mobility concerns.
Bow Lake is the epitome of immediate gratification. The main viewing area is directly adjacent to the parking lot at Num-Ti-Jah Lodge. You can step out of your car and be greeted by the expansive lake, with the Bow Glacier and Crowfoot Mountain as a dramatic backdrop. For those wanting more, an easy, flat walk along the shoreline offers changing perspectives towards the powerful Bow Glacier Falls.
Peyto Lake, on the other hand, traditionally requires a short effort for its iconic reward. The famous wolf-shaped viewpoint requires a 10-15 minute uphill paved walk from the main upper parking lot. However, following major upgrades completed in 2024, there is now a fully accessible viewing platform reachable via a separate path from the lower parking lot, making this world-class view available to visitors with strollers or mobility aids for the first time. The comparison below clarifies the key differences.
This table breaks down the access and character of each stop to help you decide where to allocate your time.
| Feature | Peyto Lake | Bow Lake |
|---|---|---|
| Walk to main viewpoint | 10-15 minute uphill paved walk from upper lot | Immediate view from parking lot |
| Accessibility | New accessible platform from lower lot | Fully accessible from parking |
| Secondary viewpoint | Bow Summit trail continues past platform | Easy shoreline walk to Bow Glacier Falls view |
| Best viewing time | Midday sun for turquoise color | Early morning for reflections |
| Parking challenge | Very busy, arrive early | Larger lot, less crowded |
Why there is no cell service for 230km of the journey?
Upon leaving the immediate vicinity of Lake Louise or Jasper, your phone will lose signal, and it will not return for virtually the entire 230-kilometre drive. This is not a technical fault; it is a deliberate feature of the park’s wilderness status. The Icefields Parkway is a designated zone of resource scarcity, and that includes digital connectivity. Parks Canada has intentionally avoided building cell towers to preserve the area’s wild character and rugged self-reliance ethos.
This “230km Dead Zone” has significant practical implications. You cannot call for help (except at a few landlines or with a satellite device), look up information, or use online maps for navigation. Treating this digital blackout as a core part of your planning is non-negotiable. Before you lose service, you must be fully prepared to operate offline.

Your digital preparation checklist should include:
- Download Offline Maps: Use an app like Maps.me, Gaia GPS, or Google Maps’ offline feature to download the entire Parkway region to your phone.
- Pin Your Stops: While you still have a connection, search for and “star” or “pin” every single viewpoint, trailhead, and point of interest you plan to visit. They will then appear on your offline map.
- Screenshot Confirmations: Take screenshots of hotel booking confirmations, tour tickets, and any other vital information you might need.
- Consider a Satellite Messenger: For those engaging in longer hikes or who want peace of mind, renting a Garmin inReach or ZOLEO satellite messenger allows for two-way text communication and an SOS function.
Emergency satellite phones are available for use at Saskatchewan River Crossing and Sunwapta Falls Rocky Mountain Lodge, but planning to not need them is the best strategy.
Running out of gas between Lake Louise and Jasper: a costly mistake
The most common and avoidable logistical failure on the Icefields Parkway is underestimating fuel needs. There is exactly one gas station along the entire 230-kilometre route: The Crossing Resort at Saskatchewan River Crossing. It is located a crucial 80 km from Lake Louise and a long 150 km from Jasper. Furthermore, it operates seasonally (typically May to October) and its hours can be limited. Assuming it will be open and available is a risky gamble.
Running out of fuel here is not an inconvenience; it is a significant financial mistake. Towing services to either Jasper or Lake Louise can easily exceed $500-$800 CAD, as many standard roadside assistance plans have distance limitations or do not fully cover service within national parks. The fuel at The Crossing itself comes at a steep premium, with prices typically running 40 to 60 cents per litre higher than in the towns of Jasper or Banff. A 50-litre fill-up could cost you an extra $25-$30 right off the bat.
The challenge is even greater for electric vehicles (EVs). As of today, there are absolutely no fast-charging stations between Lake Louise and Jasper. The 230km distance, combined with mountain inclines and potentially cold weather affecting battery performance, makes the journey impossible for most EVs on a single charge without a top-up. The only solution for EV drivers is to plan their trip as two separate “out and back” journeys from either Jasper or Lake Louise, returning to their respective towns to recharge.
Reducing pack weight by 2kg without sacrificing mandatory safety gear
While the Parkway is a scenic drive, its true magic is revealed when you step out of the car and onto a trail, even for a short 30-minute walk to a viewpoint. Carrying a well-prepared but lightweight daypack is essential. The goal is to be ready for the mountains’ rapid changes without being weighed down. Shaving 2kg (4.4 lbs) from your pack is achievable not by leaving safety gear behind, but by choosing smarter, multi-use items.
The biggest weight savings come from water and clothing. The Canadian Rockies are blessed with abundant, fast-flowing glacier-fed streams. Instead of carrying 3-4 litres of water from the start (3-4 kg), you can carry a single 1L bottle and a lightweight water filter. A filter like the Sawyer Squeeze or Katadyn BeFree weighs under 100g and allows you to refill safely from trailside sources, saving you 2-3kg instantly.
Your clothing system is the next area for optimization. Ditch redundant items like heavy cotton hoodies (which are useless when wet) and embrace a layering system where every piece works together. A base layer, a fleece or light insulated mid-layer, and a waterproof/windproof shell can handle almost any condition. This strategic approach ensures you are prepared for anything without carrying a closet on your back.
Your Parkway Daypack Weight-Saving Audit
- Water Strategy: Do I have a lightweight filter and one bottle, or am I carrying multiple heavy litres from the start?
- Clothing System: Can I replace my separate rain jacket and fleece with a single, modern, lightweight insulated active shell?
- Food Packaging: Have I transferred all snacks and meals from bulky commercial boxes into lightweight Ziploc bags?
- Multi-Use Gear: Are my trekking poles just poles, or can they also serve as a support for my shelter or a camera monopod?
- Layering Cohesion: Does every piece of clothing I’m carrying work as part of a functional base-mid-shell system, or do I have redundant “just-in-case” items?
Banff Gondola vs. Jasper Skytram: comparing altitude and amenities
At either end of the Icefields Parkway, a high-altitude ride offers a stunning overture or grand finale to your journey. Both the Banff Gondola and the Jasper Skytram lift you to over 2,200 metres, but they offer fundamentally different experiences that cater to different tastes. Choosing between them depends on what you seek: polished amenities or raw, wild vistas.
The Banff Gondola is a modern, resort-like experience. At the summit of Sulphur Mountain, you’ll find a state-of-the-art interpretive centre, a comprehensive boardwalk system leading to the Sanson’s Peak meteorological station, and the Sky Bistro, a fine-dining restaurant with arguably one of the best views in Canada. The vista is magnificent but focused on the civilization below: the town of Banff, the grand Fairmont hotel, and the sweep of the Bow Valley.
The Jasper Skytram, in contrast, retains a rustic, 1970s charm. The summit station is more of a functional launchpad than a destination in itself. The amenities are basic—a simple cafeteria—but the focus is entirely on the outdoors. From here, you can hike the rugged Whistlers Summit Trail to the true peak, immersing yourself in the alpine tundra. The view is a staggering, 360-degree panorama of untamed wilderness, an endless sea of peaks with minimal signs of human presence. It feels wilder and more immense.
This comparative table highlights the distinct character of each attraction.
| Feature | Banff Gondola | Jasper Skytram |
|---|---|---|
| Summit elevation | 2,281m (7,486 ft) | 2,277m (7,472 ft) |
| Atmosphere | Polished ‘resort on mountain’ with modern facilities | Rustic ’70s charm, launchpad for alpine hiking |
| View character | Town, Fairmont hotel, Bow Valley civilization | Raw 360-degree wilderness, endless peaks |
| Dining | Sky Bistro fine dining | Basic cafeteria style |
| Summit trails | Boardwalk system | Whistlers Summit Trail to peak |
| Free alternative | 1.5-hour Tunnel Mountain hike | Drive partway up Marmot Basin road |
Key Takeaways
- Strategic Timing: Avoiding the 10:30 AM to 3:00 PM peak at Columbia Icefield by starting very early or arriving late is the most critical factor for a crowd-free experience.
- Resource Scarcity Mindset: Plan for the 230km cell “dead zone” and the single, expensive gas station as a core part of your trip, not as an afterthought.
- Ethical Observation: Viewing wildlife is a privilege, not a right. Maintaining legal distances (100m for bears, 30m for elk) and never stopping in traffic for a “bear jam” is a legal and ethical responsibility.
Wildlife Viewing Ethics: Observing Bears and Moose Without Harm
One of the profound joys of the Icefields Parkway is the chance to see wildlife—from grizzly bears and black bears to elk, moose, and bighorn sheep—in their natural habitat. However, this privilege comes with a critical responsibility. A wildlife encounter that is thrilling for you can be stressful or dangerous for the animal. Following strict ethical guidelines is essential for their well-being and your safety, and Parks Canada enforces these rules with a potential maximum fine of $25,000 for wildlife disruption.
The most infamous Parkway phenomenon is the “bear jam,” where a line of cars stops on the highway to view an animal. This is dangerous and illegal. If you see a bear jam, slow down but continue driving. Do not stop. Find a safe, designated pull-out far down the road to observe from a distance with binoculars or a telephoto lens. The cardinal rule is to maintain a safe and legal distance at all times: a minimum of 100 metres (about the length of a football field or 10 bus lengths) from predators like bears, wolves, and cougars, and 30 metres from elk, moose, and sheep.
Learning to read animal body language is also crucial for knowing when you are too close. An animal under stress will give clear warning signs before it acts defensively.
- Bears: Huffing, clacking their jaws, or standing on their hind legs (a sign of curiosity but also of assessing a threat) mean you are too close.
- Elk and Moose: Pinned-back ears, grinding teeth, or raised hair on the neck indicate agitation. A moose licking its lips is a sign of stress.
If you see these signs, back away slowly and give the animal more space. Never feed wildlife; it habituates them to humans, often leading to their relocation or destruction. Your goal should be informed, respectful observation, not an Instagram selfie.
Now that you have the expert strategy, it’s time to put it into action. Plan your drive with these timings and preparations to ensure your journey along the Icefields Parkway is truly unforgettable.