Finding the best snowboarding in Canada isn’t about resort size; it’s about rider-centric flow and authentic culture.
- True “steep-and-deep” is about snow quality and low crowds (Revelstoke) over sheer acreage and tracked-out terrain (Whistler).
- A great trip is defined by avoiding snowboarder-specific frustrations like flat catwalks and navigating local park etiquette correctly.
Recommendation: Prioritize resorts that respect the fall line and invest in their park scene over those built primarily for two-plankers.
Forget the generic travel guides that lump skiing and snowboarding together. They don’t get it. They don’t understand the unique agony of a half-hour push across a flat catwalk, the subtle language of a terrain park, or the difference between heavy coastal “cement” and dry interior “cold smoke.” Most advice is written for skiers, leaving snowboarders to figure out the hard stuff on their own. You end up at a world-class resort that’s great for carving on groomers but a nightmare for anyone riding sideways.
This is not that guide. This is for the riders. We’re going beyond the marketing hype to talk about what actually matters: sustained fall-line pitches, park flow, and the unwritten rules of the local scene. We’ll break down the real-world logistics that can make or break a trip, from dodging Sunday traffic on the Sea-to-Sky to the dollars-and-cents debate of flying with your board versus renting demo gear. This is the insider beta you need to score the best snow and experience the authentic heart of Canadian snowboard culture.
This article dives into the critical details that truly define a great snowboard trip in Canada. From analyzing the best terrain to understanding local etiquette, we provide the insights you need to plan your ultimate riding adventure. The following table of contents will guide you through each essential topic.
Summary: The Ultimate Canadian Snowboarding Playbook
- Revelstoke vs. Whistler: which offers better steep-and-deep terrain for advanced riders?
- The “Catwalk” nightmare: resorts to avoid if you hate flat connecting trails
- Park etiquette 101: how to not get yelled at in the jump line?
- Flying with a board bag: fees vs. the cost of renting demo gear?
- Spring riding vibes: why April is the best month for soft landings and park laps?
- How to save 40% on lift tickets at Whistler Blackcomb by booking early?
- When to drive back to Vancouver to avoid Sunday ski traffic jams?
- Arctic Adventures for Adrenaline Junkies: Beyond Standard Sightseeing
Revelstoke vs. Whistler: which offers better steep-and-deep terrain for advanced riders?
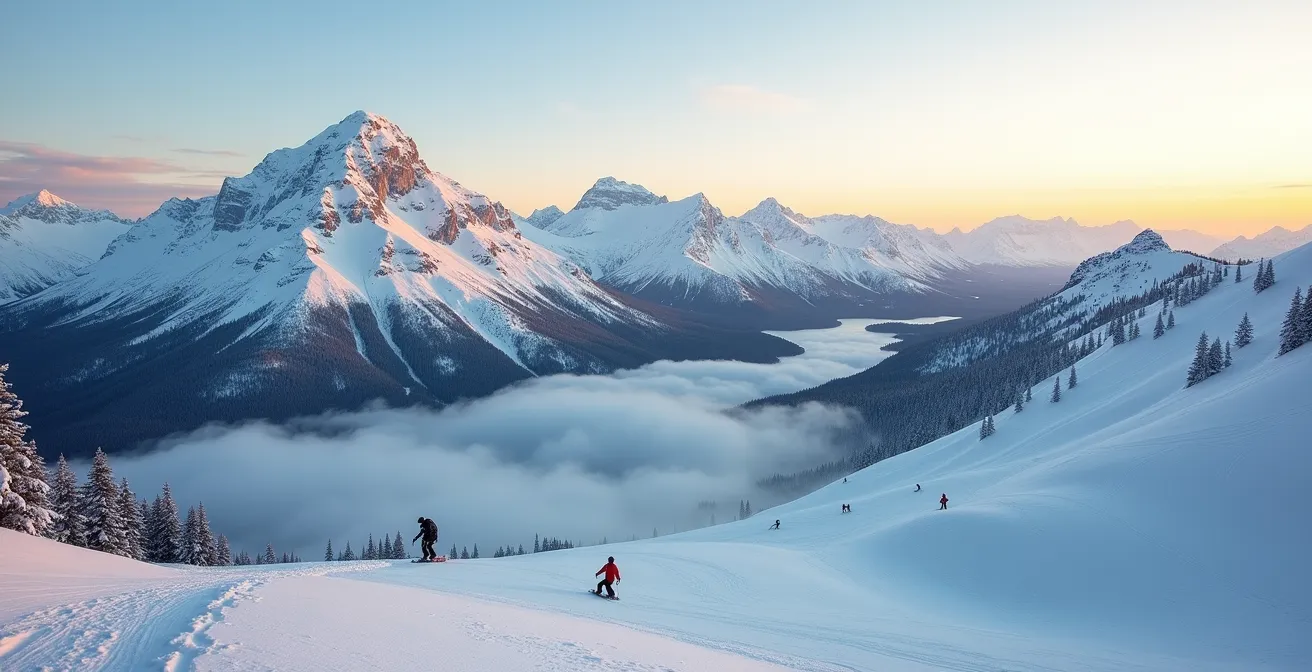
The central debate for any serious rider planning a BC trip comes down to this: the legendary scale of Whistler Blackcomb versus the raw, untamed vertical of Revelstoke. While Whistler boasts more total acreage, the “steep-and-deep” crown arguably belongs to Revy. It’s not about the size of the map; it’s about the quality of the lines. Revelstoke is built around one thing: North America’s greatest vertical drop. This translates to non-stop, fall-line riding without the annoying flat runouts that plague larger, more spread-out resorts.
The snow itself is a deciding factor. Revelstoke’s interior location blesses it with consistently light, dry ‘cold smoke’ powder—the kind of stuff you dream about. Whistler’s coastal proximity means more volume, but the snow is often heavier and can quickly turn to ‘Cascade cement’. For a powder hound, the choice is clear. While Whistler has iconic zones like Spanky’s Ladder, they get tracked out by 10 AM. Revelstoke’s lower crowd density means you can find fresh tracks in the North Bowl well into the afternoon. It’s a local’s mountain feel versus a world-class resort machine.
This detailed breakdown highlights the key differences for advanced riders seeking challenging terrain, as shown in this comparative analysis of Canadian resorts.
| Feature | Revelstoke | Whistler Blackcomb |
|---|---|---|
| Vertical Drop | 1,713m (5,620 ft) – North America’s highest | 1,609m (5,280 ft) |
| Skiable Terrain | 3,121 acres | 8,171 acres |
| Annual Snowfall | 10.5m (34 ft) dry interior powder | 11.7m (38 ft) coastal snow |
| Advanced Terrain % | 26% Expert Only | 20% Expert |
| Signature Runs | Kill the Banker, North Bowl | Couloir Extreme, Spanky’s Ladder |
| Crowd Factor | Low – local’s mountain feel | High – world-class resort traffic |
| Snow Quality | Light, dry ‘cold smoke’ | Heavier coastal ‘cement’ |
Your checklist for riding Revelstoke’s steep terrain
- Take an Avalanche Skills Training (AST) course before exploring the extensive sidecountry.
- Get to the Stoke Chair at first bell to beat the locals to the fresh stashes in North Bowl.
- Pack a wider, dedicated powder board (158w+) to stay afloat in Revy’s deep, light snow.
- Connect with local riders at the Village Idiot Bar for insider beta on hidden powder zones and current conditions.
- Download the resort app for real-time updates on avalanche control and terrain openings.
The “Catwalk” nightmare: resorts to avoid if you hate flat connecting trails
There is no greater momentum-killer for a snowboarder than the dreaded catwalk. That long, flat, narrow trail connecting two prime riding zones is a special kind of hell. One foot unstrapped, you’re reduced to a clumsy, one-legged shuffle-push while skiers glide past effortlessly. A resort’s layout and its reliance on these traverses can single-handedly ruin the flow of a day. Some Canadian resorts are more notorious for this than others, clearly designed with two planks in mind, not one.
Understanding a resort’s “rider-centric flow” before you book is critical. It’s about looking at the trail map not for the number of black diamonds, but for the connections between them. If accessing a powder bowl requires a 20-minute traverse, you’ll maybe do it once. A resort with good fall-line design lets you lap a chairlift and stay in the steeps all day. Here are some of the main offenders in Canada, where you’re likely to spend more time pushing than carving:
- Sun Peaks Resort: The notorious 5 km runout from Mt. Tod is a leg-burning traverse that tests every rider’s patience.
- Mont-Tremblant: The ‘L’Arundel’ loop on the Versant Soleil is a frustratingly flat section required to access certain zones.
- Whistler Blackcomb: While epic, the Harmony Ridge traverse back to the main village area involves significant, often-crowded pushing.
- Panorama Resort: Getting to and from the much-hyped Taynton Bowl requires navigating long catwalks that can be a slog on a board.
- Lake Louise: The backside bowls offer incredible terrain, but the return journey to the base often involves long, flat traverses that drain your speed and stoke.
Park etiquette 101: how to not get yelled at in the jump line?
A resort’s terrain park is more than just a collection of metal and snow; it’s a community with its own culture and unwritten rules. Violating this etiquette won’t just get you yelled at—it’s dangerous and shows a total lack of respect for the scene. The first rule of park is simple: look before you leap. Always check the landing is clear before you drop in on a jump or feature. Secondly, know the flow. Don’t cut the line, and give the rider in front of you ample space to clear the feature and ride away safely.
One of the most important signals is calling your drop. A simple “dropping next!” lets everyone know your intentions. In many Canadian parks, the universal signal is planting your board upright in the snow at the top of the in-run; it’s the equivalent of saying, “I’m next.” Never, ever ride in front of a planted board. Another key aspect is respecting the features. Don’t sit on the takeoff or landing of a jump. If you fall, get out of the way as quickly as you can. Finally, understand that the park crew are the unsung heroes. They spend hours shaping and maintaining the features for you. As one expert from Snowboard Canada Magazine puts it, showing them appreciation is paramount.
Shoutout the Park Crew: acknowledging them or learning their names is the ultimate sign of respect and a fast track to being accepted by the local scene.
– Canadian Snowboard Culture Expert, Snowboard Canada Magazine
The vibe can also differ geographically. East Coast parks in Quebec and Ontario tend to be a bit more laid-back, while the main parks on the West Coast, like at Whistler, have a more intense, almost-pro atmosphere where every line is taken seriously. Knowing this can help you fit in and have a better session.
Flying with a board bag: fees vs. the cost of renting demo gear?
The eternal question for any fly-in snowboard trip: do you lug your own gear through the airport or just rent a high-performance demo board at your destination? The decision hinges on a balance of cost, convenience, and comfort. Flying with your own board means you’re riding a setup you know and trust. There’s no learning curve, and your boots are perfectly molded to your feet. However, it comes with a price. Most Canadian airlines like Air Canada and WestJet classify a snowboard bag as oversized sports equipment, with fees typically ranging from $75-150 CAD each way.
On the other hand, renting a demo board means no airport hassle and the chance to try out the latest technology. Demo shops in resorts like Whistler or Banff are stocked with brand-new, top-of-the-line boards specifically suited for local conditions. The downside is the daily cost, which can add up quickly on a longer trip, and the risk that the perfect board or size might not be available during peak season. Shipping your board ahead is a third option that offers a middle ground, but it requires planning.
This table breaks down the approximate costs for a trip to a major Canadian resort, using data from recent analyses on travel expenses.
| Option | 3-Day Trip Cost | 7-Day Trip Cost | Pros | Cons |
|---|---|---|---|---|
| Flying with Board (Round Trip) | $150-300 | $150-300 | Use your own gear, no daily rental hassle | Airport logistics, risk of damage |
| Demo Rental – Whistler | $240-300 | $560-700 | Latest gear, local shop intel included | Different board each trip |
| Demo Rental – Banff | $180-240 | $420-560 | Try different boards, no travel hassle | Availability during peak times |
| Ship Board Ahead | $100-150 | $100-150 | Arrives before you, less airport stress | Requires planning, shipping address needed |
Spring riding vibes: why April is the best month for soft landings and park laps?
While many chase the deep powder of mid-winter, seasoned riders know that April is often the true golden month of snowboarding in Canada. This is the season of “spring riding,” a magical time of bluebird days, soft “corn” snow, and an unbeatable celebratory atmosphere. The fear of catching an edge or taking a hard fall diminishes when the snow softens up under the warm sun, making it the perfect time to progress in the park and try new tricks. Landings are forgiving, and the vibe is all about fun and creativity.
The culture peaks in spring. Parking lots transform into tailgate BBQs, and on-mountain attire often shrinks to a t-shirt under an open jacket. This is also when resorts host their biggest end-of-season events. The World Ski & Snowboard Festival (WSSF) in Whistler is the pinnacle, a week-long party combining pro competitions with free concerts and art shows. Similarly, Sunshine Village in Banff hosts its legendary Slush Cup, an infamous pond-skimming event that marks the ultimate end-of-season bash. These festivals create an electric atmosphere where the entire mountain community comes together to celebrate another winter in the books. According to Alberta resort data, many Canadian resorts have seasons that can run until late May, giving you nearly seven months to ride.
To make the most of it, you need the right strategy:
- Time your day: Start after 10 AM when the sun has softened the overnight freeze into perfect “corn snow.”
- Pack for the sun: High SPF sunscreen and glacier glasses are non-negotiable as the sun reflecting off the snow is incredibly intense.
- Embrace the culture: Bring a cooler and some camp chairs for the essential parking lot tailgate session.
- Layer down: Wear light, breathable layers. You’ll be surprisingly warm by midday.
- Book ahead: Accommodation during major festival weekends like WSSF or the Slush Cup sells out fast.
How to save 40% on lift tickets at Whistler Blackcomb by booking early?
Walking up to the ticket window at Whistler Blackcomb is the most expensive way to go snowboarding. The resort uses a dynamic pricing model, which means prices fluctuate based on demand, but one rule is constant: the earlier you buy, the more you save. The biggest discounts are reserved for those who plan ahead. By booking your lift tickets at least seven days in advance, especially during off-peak periods, it’s possible to achieve up to 40% savings available when booking 7+ days in advance compared to the day-of window rate. This single action can save you hundreds of dollars on a multi-day trip.
But early booking isn’t the only way to cut costs. There are several other strategies that locals and savvy visitors use to make riding North America’s largest resort more affordable. These “hacks” can provide significant value if your plans align with their requirements.
- The Edge Card: This is the best deal for residents of British Columbia and Washington State. It offers a pre-loaded number of days at a deeply discounted rate, plus other perks like friend discounts.
- Ride Mid-Week: If your schedule is flexible, booking tickets for a Tuesday, Wednesday, or Thursday can be up to 30% cheaper than riding on a peak Saturday.
- The Epic Pass: For international visitors or those planning to ride 5 or more days, the Epic Pass often becomes the most economical option. Do the math to find your break-even point compared to buying individual day tickets.
- Afternoon Tickets: On deep powder days when you know the good stuff won’t be tracked out by noon, arriving after 12:30 PM can get you a discounted afternoon ticket.
- Compare Nearby: If your priority is big mountain terrain over village amenities, consider that resorts like Revelstoke and Kicking Horse offer a similar vertical experience for nearly 40% less cost per day.
When to drive back to Vancouver to avoid Sunday ski traffic jams?
The drive on the Sea-to-Sky Highway from Whistler to Vancouver can be one of the most beautiful in the world—or one of the most frustrating. On a Sunday afternoon, the mass exodus from the mountains back to the city creates legendary traffic jams, turning a scenic 2-hour drive into a 4-hour-plus crawl. For any Vancouver-based rider, mastering the Sunday traffic strategy is as important as any skill on the snow. There are two golden rules: leave early or leave late. The peak congestion typically builds from 2 PM to 7 PM. To beat it, you need to be on the road before 1 PM or wait until after 8 PM.
Leaving late is often the better call. Instead of sitting in traffic, you get a few extra hours on the mountain or can enjoy a relaxed dinner in the village as it quiets down. By 8 PM, the highway is usually clear. If you must travel during the peak window, be aware of the main choke points: the traffic merge in Squamish, the narrow sections through Lions Bay, and the final slowdown at the Taylor Way hill approaching West Vancouver. Following the DriveBC Twitter feed for real-time updates on accidents or stalls is essential.
As a Vancouver local who rides Whistler every weekend, I’ve learned the hard way that leaving at 3 PM on Sunday means a 4-hour drive home. Now I either leave by noon for a 2-hour drive, or stay for dinner and leave at 8 PM. The village is actually peaceful Sunday evening, and you can get great last-minute hotel deals.
– Vancouver Local Snowboarder
Another pro move is to simply book your accommodation for Sunday night. Hotel rates often drop significantly on Sunday, and you can enjoy a stress-free drive back on Monday morning. Using a shuttle or rideshare service is also a great alternative, allowing you to nap instead of white-knuckling it in gridlock.
Key Takeaways
- Prioritize rider-centric resort design: look for sustained fall-line runs and minimal flat catwalks.
- Understand and respect local park etiquette; it’s about safety and community, not just tricks.
- Analyze the true cost of a trip, weighing board bag fees against demo rentals and factoring in timing for lift tickets and travel.
Arctic Adventures for Adrenaline Junkies: Beyond Standard Sightseeing
For the rider who has seen the Rockies and lapped the parks of Quebec, the ultimate Canadian snowboard adventure lies further north—in the vast, frozen landscapes of the Arctic. This isn’t about resort riding; it’s about pushing the boundaries of the sport in one of the world’s most extreme environments. These are true expeditions that combine high-adrenaline riding with profound cultural immersion and natural wonder. While the Yukon offers incredible backcountry terrain with a season boasting over 150 days of rideable snow annually, the most unique experience might be even further north.
This is where snowboarding transcends from a sport into a genuine adventure, requiring a different level of preparation, respect for the environment, and a willingness to embrace the unknown. The reward is an experience that few people on earth will ever have: the feeling of carving a line in complete solitude, under the glow of the aurora borealis.
Case Study: Snow-Kiting on the Arctic Ocean
In Tuktoyaktuk, Northwest Territories, you can find one of the world’s most unique snowboarding platforms: the frozen Arctic Ocean. From January to April, the combination of consistent Arctic winds and endless, flat pack-ice creates a massive playground for snow-kiting. Advanced riders can use large kites to propel themselves across the ice, covering 50+ kilometers in a single day. This is adventure riding at its purest, combining the skills of snowboarding with the power of the wind, all while under the potential glow of the northern lights. Local Inuvialuit guides are essential, providing not just safety expertise for the extreme conditions but also a deep cultural context for the land, creating a trip that is as much about learning as it is about riding.
Now that you’re equipped with the insider knowledge to navigate Canada’s best mountains, parks, and logistical hurdles, the next step is to start planning. Apply these principles, choose a destination that aligns with your riding style, and go experience the authentic snowboard culture that makes Canada a world-class destination.
Frequently Asked Questions about Snowboarding in Canada
What’s the difference between East Coast and West Coast park culture in Canada?
East Coast parks (Quebec/Ontario) tend to be more laid-back with a ‘sorry, eh?’ attitude, while West Coast parks like Whistler’s main park have a more intense, almost-pro atmosphere where riders take their lines very seriously.
What does a snowboard planted upright in the snow mean?
This is the universal Canadian signal that someone is about to drop into a feature. Never cut in front of a planted board – it’s like cutting in line.
How do I show respect to the park crew?
Learn their names, give them a nod or fist bump, and never ride through freshly groomed features before they’re finished. The park crew are the unsung heroes who shape your playground.