The greatest shot of the Arctic isn’t the one you take, but the one you earn through meticulous, conservation-first discipline.
- Technical mastery in the tundra—from battery management to ISO settings—is secondary to ethical conduct and environmental respect.
- Understanding the extreme fragility of the ecosystem, where a single footstep can cause decades of damage, is non-negotiable.
Recommendation: Shift your mindset from “capturing a landscape” to “acting as a privileged witness,” where every decision prioritizes the preservation of the unforgiving environment you’re in.
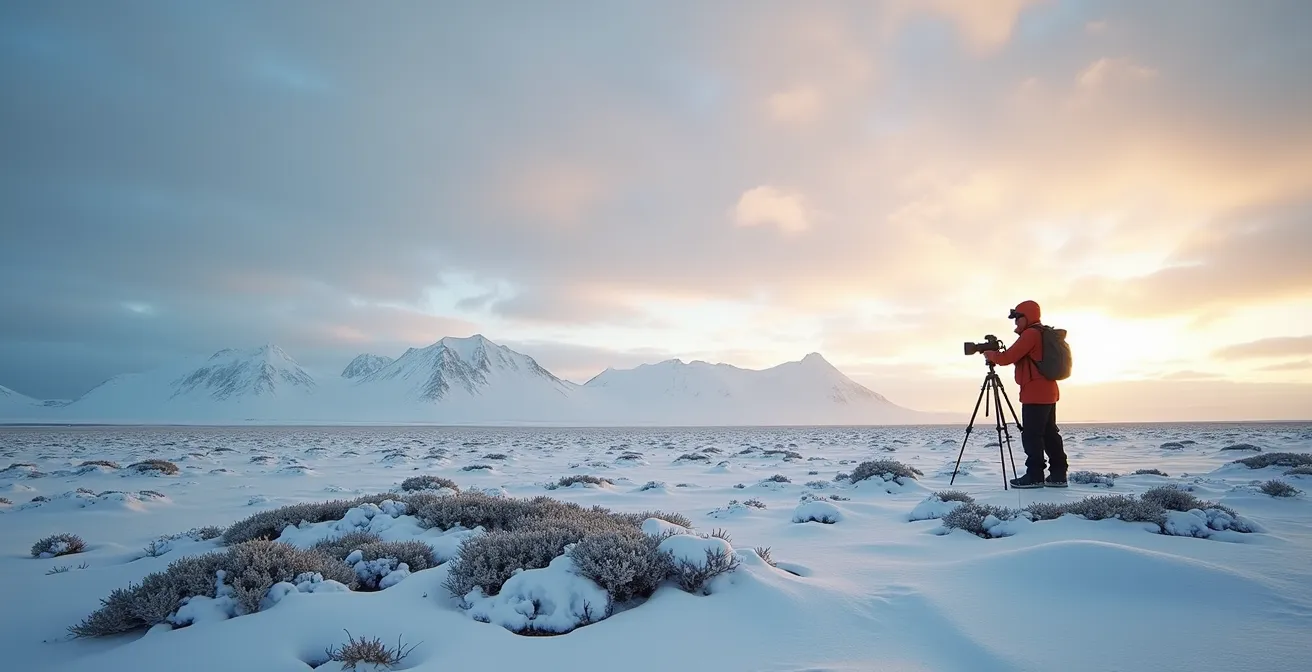
The Arctic tundra holds a primal allure for photographers. It’s a realm of immense, quiet power, where the light behaves in ways found nowhere else on Earth and the emptiness itself becomes a subject. The instinct is to capture its grandeur—the sweeping vistas, the ethereal glow of an aurora, the resilient wildlife. Many guides focus on the technical aspects of achieving this: the right lens, the correct settings, the best time of day. But this approach misses the fundamental truth of working in such a place.
The tundra is not merely a backdrop; it’s an incredibly fragile, living system that is slow to heal. Here, the pursuit of a photograph cannot be the primary goal. The true art of Arctic photography lies in a philosophy of profound respect, a ‘conservation-first, composition-second’ mindset. It demands that we see ourselves not as artists conquering a landscape, but as privileged witnesses granted temporary access to an ancient, unforgiving world. The real challenge isn’t technical, but ethical. It’s about learning the discipline to walk away from a shot to protect a patch of lichen, or understanding that the most important piece of gear you have is your awareness.
This guide is built on that principle. We will explore the technical craft required to succeed in this environment, but always through the lens of minimal impact. From the logistics of reaching Canada’s remote coasts to the specifics of keeping your gear functional at -30°C, each piece of advice is a component of a larger operational discipline. This is how you move beyond simply taking pictures to creating images that are born from a deep, meaningful, and responsible connection to the Arctic.
To navigate this demanding yet rewarding field, we have structured this guide to address the most critical challenges you will face, from gear preservation and personal safety to the specifics of capturing light and respecting wildlife. Explore the sections below to build your operational discipline as a conservation photographer.
Summary: Capturing the Arctic Tundra Responsibly
- How to protect camera batteries in -30°C temperatures during a shoot?
- Why stepping off marked paths destroys lichen for decades?
- Churchill vs. Tuktoyaktuk: best spots for dramatic landscape shots?
- The danger of disorienting “whiteouts” even near your camp
- Getting the best lighting during the short winter days of the North
- Adjusting ISO settings for vibrant green captures without grain
- Using telephoto lenses to maintain the mandatory 100m distance
- Exploring Canada’s Arctic Coasts: A Logistics Guide for the Intrepid Traveler
How to Protect Camera Batteries in -30°C Temperatures During a Shoot?
In the extreme cold of the Canadian Arctic, your camera’s battery is its weakest link. Lithium-ion cells lose a significant portion of their charge when exposed to sub-zero temperatures, and a dead battery means a missed opportunity and a potential safety risk. Effective battery management is not just a technical tip; it’s a fundamental part of your operational discipline. The key is to treat your batteries like a vital resource, protecting them with your own body heat.
Professionals adopt a strict rotation system. Keep your primary active battery in the camera, but store all your spares in an insulated pouch within an inner pocket of your parka, close to your chest. Every 20 to 30 minutes, swap the battery from your camera with a warm one from your pocket. This simple act dramatically extends the life of each cell throughout the day. It’s also crucial to choose the right type: lithium batteries consistently outperform alkaline ones in the cold, often by as much as 40%. For extended shoots, especially when filming, an external battery pack kept warm inside your jacket and connected via a weatherproofed cable is an indispensable solution.
To manage this effectively in harsh conditions, you need to be able to work quickly and efficiently. This includes wearing thin liner gloves that allow you to handle small batteries without exposing your bare skin to the risk of frostbite. Photographers on Canadian Arctic expeditions, often based at facilities like the Churchill Northern Studies Centre, have perfected these techniques, using controlled environments to pre-warm gear and even employing all-terrain vehicles with power supplies for field charging during long days on the tundra.
Why Stepping Off Marked Paths Destroys Lichen for Decades?
The Arctic tundra may look barren and resilient, but it is an ‘unforgiving ecosystem’ of profound fragility. The most critical rule of tundra photography is to stay on marked paths or durable surfaces like rock and snow. The reason lies in the almost imperceptibly slow life cycle of its ground cover, particularly lichens and mosses. A single footstep can crush these delicate, slow-growing organisms, and the damage can persist for decades, if not centuries. This is not an exaggeration; it is a biological reality dictated by the harshness of the environment.
The extreme slowness of recovery is due to the severe lack of resources. Research shows that some northern areas of the Canadian High Arctic Tundra receive as little as 50 mm of annual precipitation, making it a true polar desert. With a short growing season of just a few weeks and minimal nutrients in the soil, plants have no capacity for rapid regeneration. When you step on a patch of lichen, you are not just disturbing the surface; you are breaking a structure that may have taken a human lifetime to grow. This is why the ‘conservation-first’ mindset is paramount. The “perfect” angle for a photograph is never worth the permanent scar it leaves on the landscape.
Responsible photographers practice what is called deliberate movement. This involves planning your shot before you move, carefully choosing every foot placement, and retracing your own footprints when possible. It also means accepting that some shots are simply not possible. This acceptance of missed opportunities is the hallmark of a true conservation photographer. You are a visitor, and your primary duty is to leave the environment exactly as you found it, ensuring this fragile beauty remains for others to witness.
Churchill vs. Tuktoyaktuk: Best Spots for Dramatic Landscape Shots?
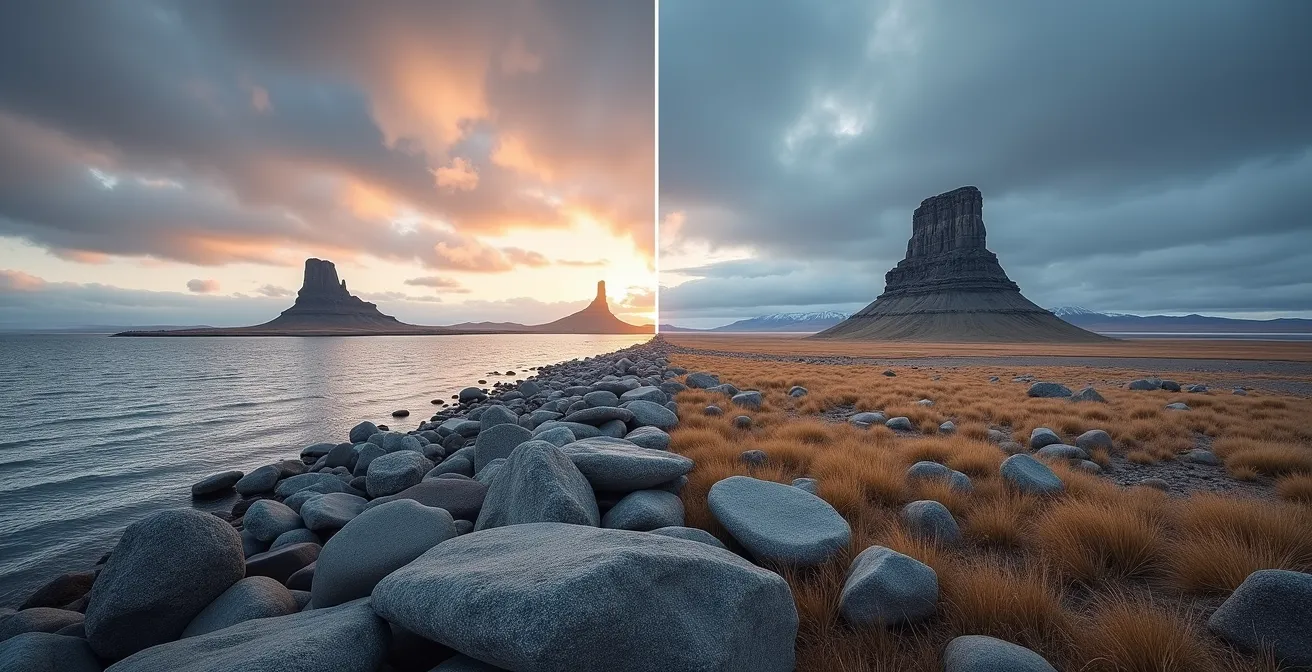
Choosing your destination is the first step in responsible Arctic photography, and in Canada, two iconic but vastly different locations offer unique opportunities: Churchill, Manitoba, and Tuktoyaktuk, Northwest Territories. Your choice depends entirely on the story you want to tell. Churchill is the more accessible of the two, renowned as a wildlife hub on the shores of the Hudson Bay. Tuktoyaktuk, at the end of the Dempster Highway, is a gateway to the raw, geological drama of the Arctic Ocean.
Churchill’s photographic appeal lies in the intersection of tundra and sea. During the summer and autumn months, its landscape is often painted with the vibrant magenta of fireweed, providing a stunning foreground for images of polar bears that gather on the coast. The opportunity to photograph bears against a backdrop of tundra wildflowers or a moody Hudson Bay is a signature Churchill experience. It is a landscape defined by life and seasonal change. In contrast, Tuktoyaktuk is a landscape defined by geology and ice. It is the place to witness and photograph the unique permafrost features of the Arctic, most notably the iconic pingos—hills with a core of solid ice that rise dramatically from the flat coastal plain.
Both locations demand strict adherence to local regulations. In Churchill, Manitoba Conservation permits are often required, while in Tuktoyaktuk, you are in the Inuvialuit Settlement Region, and their guidelines must be respected. The following table breaks down the key differences to help you plan your expedition with purpose and respect.
| Aspect | Churchill, Manitoba | Tuktoyaktuk, NWT |
|---|---|---|
| Best Season | July-November (polar bears) | June-September (pingos, coastal erosion) |
| Key Features | Hudson Bay shores, tundra wildflowers, polar bears | Arctic Ocean access, pingos, permafrost features |
| Access | Flights via Winnipeg, rail from Thompson | Dempster Highway, flights from Inuvik |
| Photography Highlights | Bears against fireweed, beluga whales | Unique geological formations, midnight sun |
| Local Regulations | Manitoba Conservation permits required | Inuvialuit Settlement Region guidelines |
The Danger of Disorienting “Whiteouts” Even Near Your Camp
In the Arctic, the weather is not an inconvenience; it is an active force that can become life-threatening with shocking speed. The most deceptive and dangerous of these phenomena is the whiteout. It occurs when overcast skies, falling snow, and a snow-covered landscape merge, completely eliminating the horizon and all sense of direction. You can become dangerously disoriented just a few meters from the safety of your camp, making personal safety an absolute prerequisite for any photography.
With average winter temperatures in the High Arctic hovering around -32°C, becoming lost is not a trivial matter. Exposure can set in rapidly. This is why rigorous safety protocols are not optional. Before the weather even hints at changing, high-visibility flag lines should be installed between all key points of your camp, such as your tent, your vehicle, and your bathroom area. These simple lines become literal lifelines in zero visibility. Furthermore, never venture out alone in conditions where a whiteout is possible; the buddy system is a non-negotiable rule.
Technology is a powerful aid, but it cannot be your only one. Your GPS ‘home’ coordinates should be programmed into multiple devices, but you must also carry and know how to use a map and compass. Remember to account for the extreme magnetic declination in the Canadian Arctic, which can render a compass useless if not corrected for. Your daypack, even for a short walk from camp, must always contain an emergency shelter, a stove, food, and signaling devices like a whistle and mirror. Preparation is the only defense against the disorienting power of a whiteout.
Getting the Best Lighting During the Short Winter Days of the North
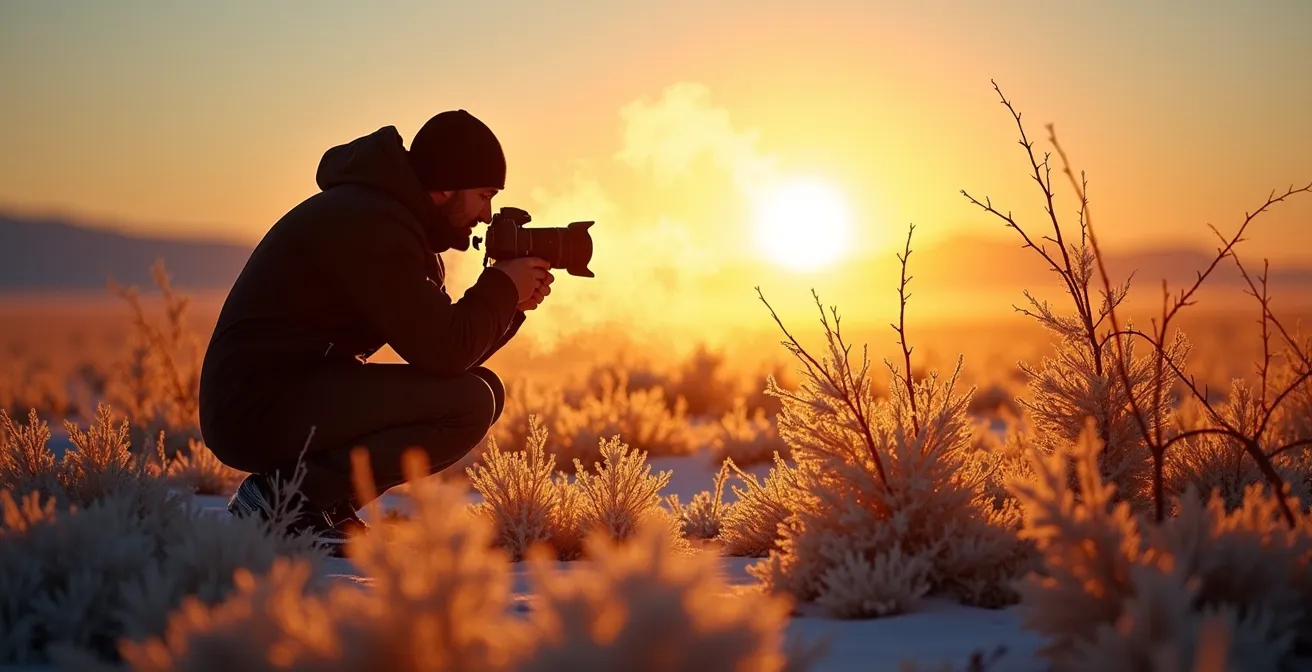
The light in the Arctic is legendary. During the short winter days, the sun remains low on the horizon, creating an extended ‘golden hour’ that can last for the entire period of daylight. This low-angle light rakes across the landscape, sculpting every drift of snow and casting impossibly long shadows. It’s a photographer’s dream, turning even the most subtle textures into dramatic subjects. However, harnessing this light requires a shift in perspective.
Many photographers look for grand, sweeping vistas. Yet, professional Arctic photographers know that the most compelling colour and texture are often found at your feet. The strongest autumn hues in the tundra are not in the distant hills but in the ground-hugging vegetation like berry plants and dwarf birch. To capture this, get low. Using a wide-angle lens close to the surface can place these vibrant, resilient plants in the context of the vast landscape. Conversely, a short telephoto lens allows you to isolate specific patches of colour, creating an abstract and powerful composition.
Interestingly, bright, sunny days are not always ideal. Overcast conditions are often preferable for capturing the tundra’s subtle colours. The soft, diffused light from a cloudy sky acts like a giant softbox, reducing harsh contrast and allowing the deep reds, oranges, and greens of the vegetation to truly pop. This soft light is perfect for detailed, intimate landscapes that tell a story of resilience and hidden beauty. The key is to see beyond the grand view and focus on the intricate world beneath your feet, working *with* the available light rather than waiting for a perfect sunset.
Adjusting ISO Settings for Vibrant Green Captures Without Grain
Photographing the aurora borealis is a bucket-list goal for many, but capturing its vibrant greens and dancing movements without introducing debilitating digital noise (grain) requires a precise technical approach. Your camera’s ISO setting, which controls its sensitivity to light, is the most critical variable. Pushing it too high will capture a brighter aurora but at the cost of a grainy, low-quality image. The goal is to find the delicate balance between capturing sufficient light and maintaining image integrity.
Northern Lights photography should be taken on manual camera setup with a wide-angle lens that allows more light in because of the f/2.8 or lower aperture. The ISO should be between 800 and 3200. Set the exposure to 5-30 seconds, depending on the intensity of the lights.
– Svalbard Photography Experts, Arctic Photo Experience Guide
As a general rule, start with a moderate ISO, typically between 800 and 1600, for a reasonably bright aurora. Only increase it to 3200 if the display is very faint. To achieve clean images at higher ISOs, professionals use a technique called image stacking. This involves shooting 10-20 identical frames and then blending them together in post-processing software. This process averages out the random digital noise, resulting in a much cleaner final image than a single long exposure could ever achieve.
Always shoot in RAW format, as it gives you the maximum flexibility to reduce noise in software like DxO PhotoLab or Adobe Lightroom without destroying image detail. Another advanced technique is to “Expose to the Right” (ETTR), which means intentionally overexposing the image slightly without blowing out the highlights. This captures the maximum amount of light data, making it easier to produce a clean, vibrant image after adjustments. It is this combination of in-camera settings and post-processing techniques that yields professional-quality aurora photographs.
Using Telephoto Lenses to Maintain the Mandatory 100m Distance
In Arctic wildlife photography, your lens choice is not just an artistic decision—it’s an ethical and legal one. Approaching wildlife like polar bears, muskoxen, or caribou is not only incredibly dangerous but also causes them significant stress, altering their natural behaviours. In many regions, such as Nunavut, there are strict regulations mandating minimum viewing distances, often 100 meters or more for predators. Your telephoto lens is the tool that allows you to comply with these rules while still creating intimate, powerful images.
The “Conservation-First” mindset dictates that the animal’s welfare is always the priority. A long lens is essential because Arctic wildlife is unpredictable and will not pose for a photograph. Respecting safety and policy means shooting from a distance. Experts universally agree on this, with many recommending bringing a telephoto lens of at least 300mm as a mandatory minimum. Many professionals carry lenses in the 400mm to 600mm range, often paired with a 1.4x or 2x teleconverter for even greater reach. This equipment allows you to fill the frame with your subject without ever taking a step closer.
Using such long lenses effectively requires support. A sturdy, full-sized tripod or at least a monopod is not optional; it’s essential for achieving sharp images and avoiding fatigue. Hand-holding a 500mm lens for extended periods is simply not feasible. The telephoto lens, therefore, is more than a piece of glass. It is a tool of respect. It allows you to be a privileged witness from a safe, unobtrusive distance, capturing the wildness of your subject without diminishing it by your presence. It’s the ultimate expression of capturing an image without leaving a trace.
Key Takeaways
- The ‘Conservation-First, Composition-Second’ mindset is the only ethical approach to tundra photography.
- The Arctic ecosystem is extremely fragile; technical choices like staying on paths and maintaining wildlife distance are non-negotiable.
- Mastering your gear for extreme cold and understanding safety protocols are prerequisites for any successful expedition.
Exploring Canada’s Arctic Coasts: A Logistics Guide for the Intrepid Traveler
A successful Arctic photography expedition is born long before you step onto the tundra. It begins with meticulous planning and a deep understanding of the logistical challenges involved. The Canadian Arctic is vast, remote, and highly regulated. You cannot simply show up and start shooting. Embarking on this journey requires a commitment to research, securing permissions, and ensuring you have the right support structure in place.
Many professional photographers and serious enthusiasts choose to base their trips around established research facilities or guided expeditions. Organizations like the Churchill Northern Studies Centre in Manitoba offer specialized programs that provide not only logistical support but also invaluable access to local expertise. Participating in a program like this allows you to learn directly from scientists and seasoned guides about wildlife adaptations, climate change impacts, and the specific conservation challenges of the region. This context will immeasurably enrich your photography and ensure your presence is a positive one.
Navigating the web of permits is perhaps the most critical part of your planning. The Canadian Arctic is a patchwork of national parks, territorial lands, and Inuit Owned Lands, each with its own set of rules. Drones, for example, are banned in most protected areas. Attempting to navigate this on your own is a daunting task. Working with a reputable tour operator who understands the intricacies of the permitting process is the most reliable path to a compliant and successful trip. This logistical groundwork is the foundation of your entire project, demonstrating respect for the land and its people before you even take your first photograph.
Your Essential Arctic Permit Checklist
- Parks Canada photography permits: Apply for any activities within National Park boundaries at least 30 days in advance.
- Territorial land use permits: Secure these for access to crown land in the Northwest Territories or Nunavut.
- Inuit Owned Lands permissions: Contact the relevant regional Inuit associations to request access to their lands.
- Transport Canada drone certificate: Obtain the necessary certificate, but be aware that drones are banned in most parks and conservation areas.
- Emergency evacuation insurance: Ensure you have a policy that specifically covers Arctic medevac costs, with a recommended coverage of $50,000 or more.
The journey to becoming a responsible Arctic photographer is one of continuous learning and deep respect. By prioritizing the health of the ecosystem and the safety of its wildlife above all else, you not only protect this incredible environment but also elevate your own art. Begin planning your expedition today with a conservation-first mindset, and earn the right to witness and capture the profound beauty of the North.